
AI Product Photography: White Background to Branded Scene
AI product photography in practice: shoot on a phone, get a white-background image, swap in a branded scene, upscale, and export to Amazon and Google rules.
 Elena Vasquez 11 min read
AI product photography means keeping the real product pixels from a photo and generating everything around them: the surface, the light, the props and the scene. It is not asking a model to draw your product from a description, because that changes labels and shapes. This guide walks the LazyKiwi route from a phone photo to a white-background listing image to a branded lifestyle scene in the AI image generator, then covers the marketplace rules that decide where each image can be used, the prompts that work, the free options, and the mistakes that make an image unusable. Tool costs and marketplace rules were checked on 2026-09-06.
What is AI product photography and when should you use it?
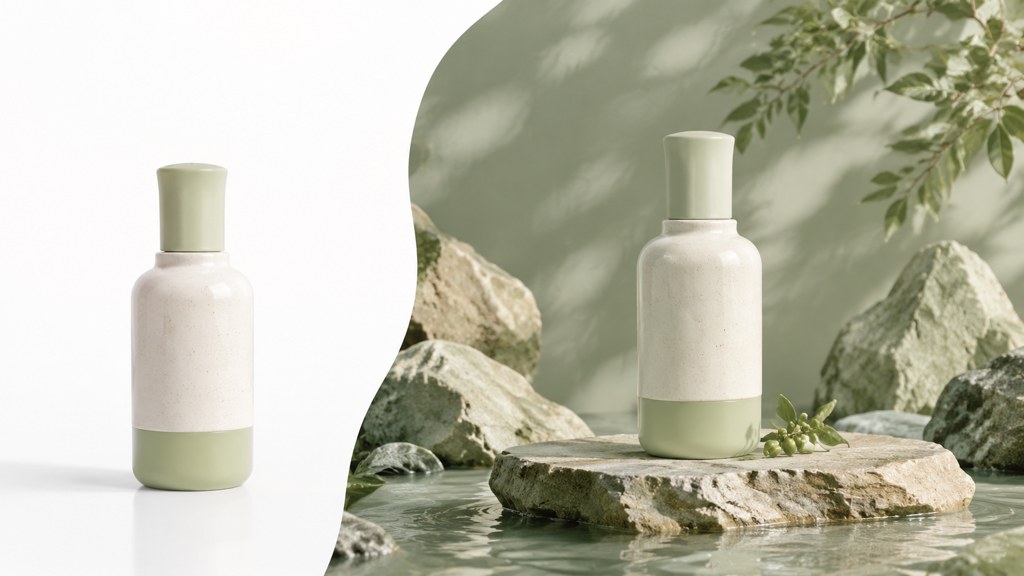
Product photography AI tools do two jobs well: they cut a product out of a messy photo and place it on a clean background, and they build a scene around that cutout from a text description. What they cannot do reliably is reproduce small text, seams, ports and caps from scratch, so the product itself should always come from a photograph.
When does using AI for product photography pay off?
- One product, many contexts: a serum bottle on a bathroom shelf for the gallery, on stone for an ad, next to a travel bag for social, all from one approved source photo.
- Seasonal refreshes: the same catalog re-shot for a holiday palette without a studio day.
- Marketplace hygiene: turning supplier photos with mixed backgrounds into a consistent white-background set.
- Pre-launch: showing a product in use before physical samples exist, clearly labelled as a render internally.
What can AI not change in a product image?
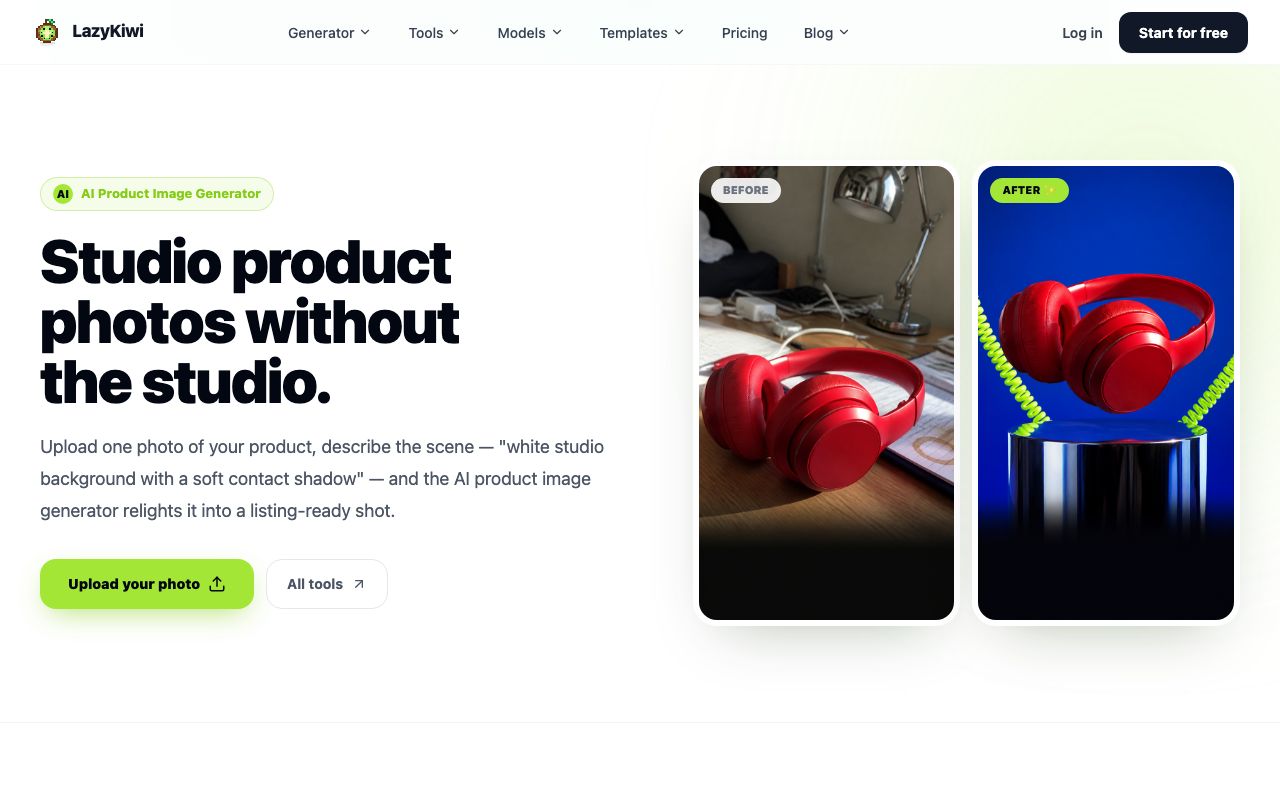
Anything a buyer relies on: shape, proportions, colour, label text, certification marks, included accessories and quantity. Shopify's ecommerce photography guide notes that the plain white-background style is the one shoppers expect on marketplaces such as Amazon, with lifestyle shots as the creative layer on top, per Shopify (2026). Keep the factual image factual and let the generated scene carry the mood.
| Approach | Best for | Risk |
|---|---|---|
| Generate the whole product from text | Concepts, fictional products | Wrong shape, invented text and features |
| Keep the photo, generate the scene | Listings, ads, social, email | Shadow and reflection mismatch |
| Studio or location shoot | Demonstrations, transparent goods, hands-on use | Cost and lead time per new scene |
How to do AI product photography step by step
The whole route uses three tools in the image workbench and one optional model. Every run below was priced on 2026-09-06 with a promotional discount showing on the button; read the button before you generate because prices change.
- 1
Shoot the product on a phone
Daylight from a window, product on a plain surface, camera at the product's mid-height, no zoom. Take a front view and a three-quarter view. Sharp edges and readable packaging matter more than the background.
- 2
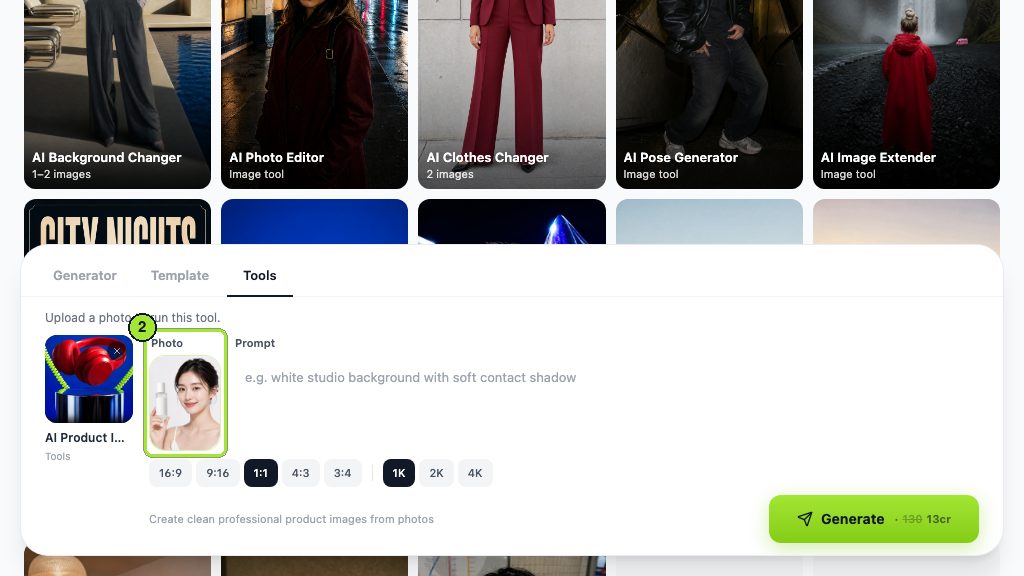
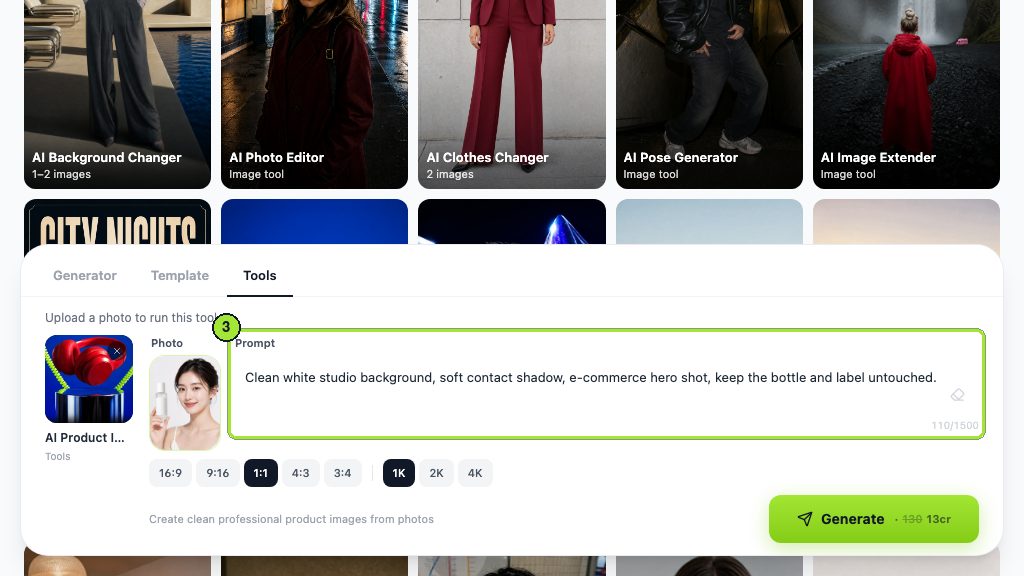
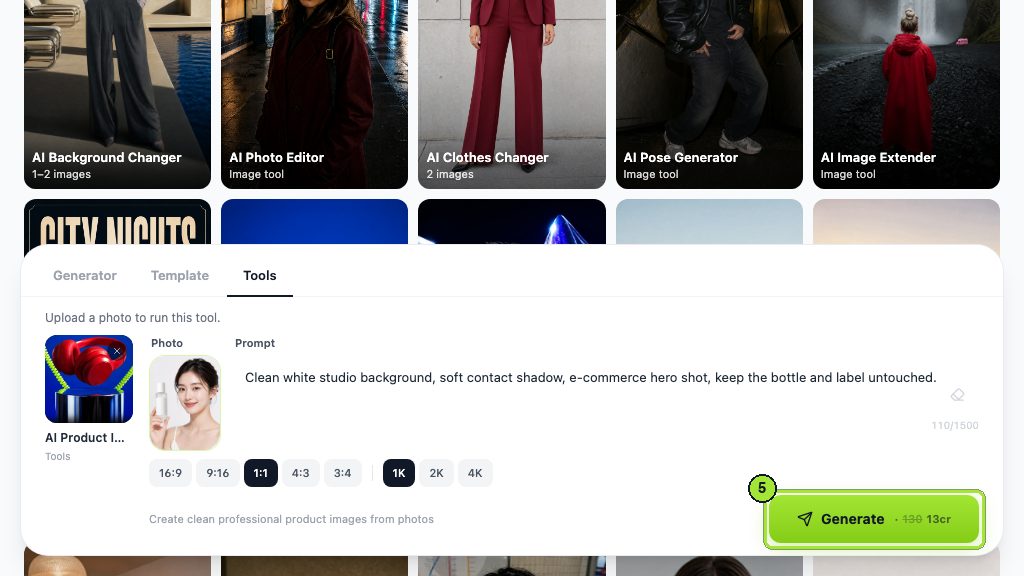
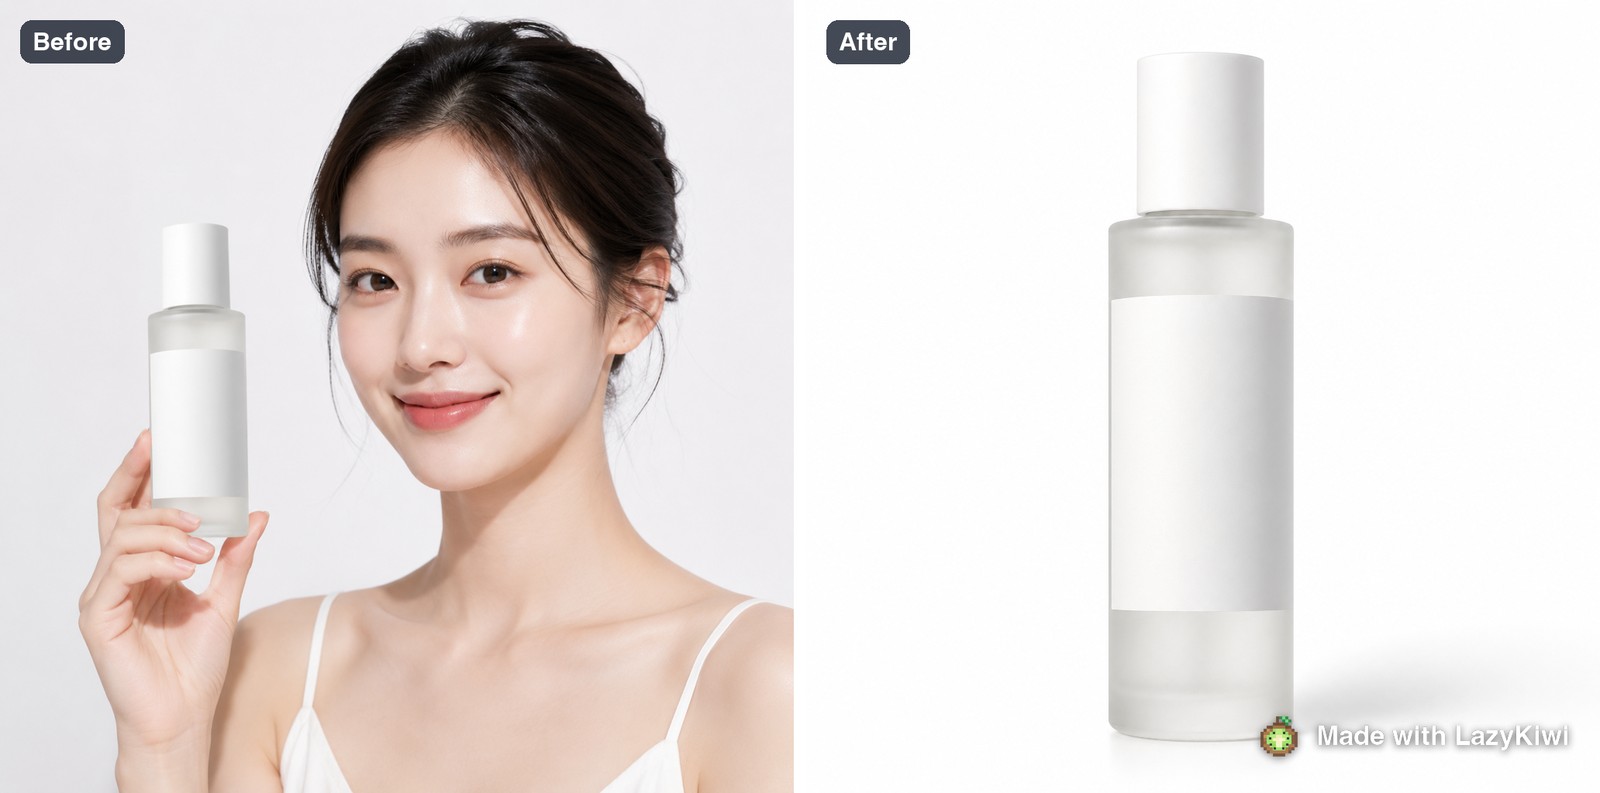
Make the white-background image
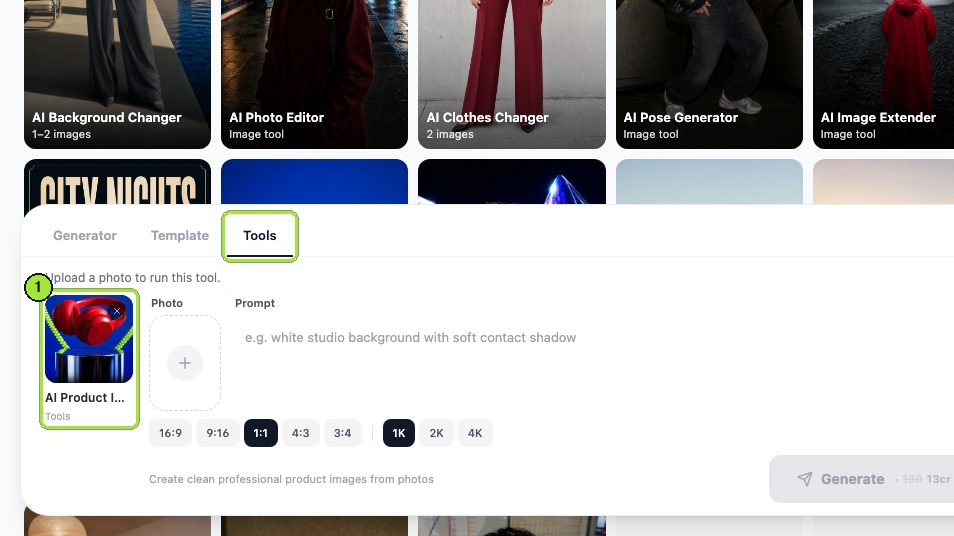
Open the AI product image generator, upload the photo and type the surface you want, for example 'white studio background with soft contact shadow'. Choose 1:1 for marketplaces, then 2K or 4K output. The button quoted 13 credits per run on 2026-09-06.
- 3
Build the branded scene
Take the same photo into the AI background changer. It accepts a subject photo, an optional background photo and a prompt, and keeps the main subject intact while replacing everything else. Describe surface, light direction and one or two props.
- 4
Upscale before export
Run the approved image through the AI photo upscaler so zoom views and 1500-pixel marketplace crops stay sharp. Upscale last, after any edits, so you only pay for the final.
- 5
Export one file per channel
Square for marketplaces, 4:5 or 9:16 for social, 16:9 for email banners. Each is a separate composition, not a crop of the same one.
- 6
Compare against the source
Put the output next to the original photo at 100 percent. Check label spelling, cap and handle position, colour and the shadow direction against the light you described.
Order matters
Background first, upscale last. Upscaling a source photo before the scene swap doubles the credits and does nothing for the generated pixels.
What are the marketplace image rules you must follow?
Marketplaces decide what a generated image may be used for. Google Merchant Center requires product images of at least 500 by 500 pixels from January 31, 2027, recommends around 1500 by 1500 pixels or larger, and rejects files over 64 megapixels or 16 MB, per Google Merchant Center Help (2026). Amazon keeps a dedicated section of MAIN image requirements and, since our last check, a section on AI-generated people disclosure in its Product image guide (2026).
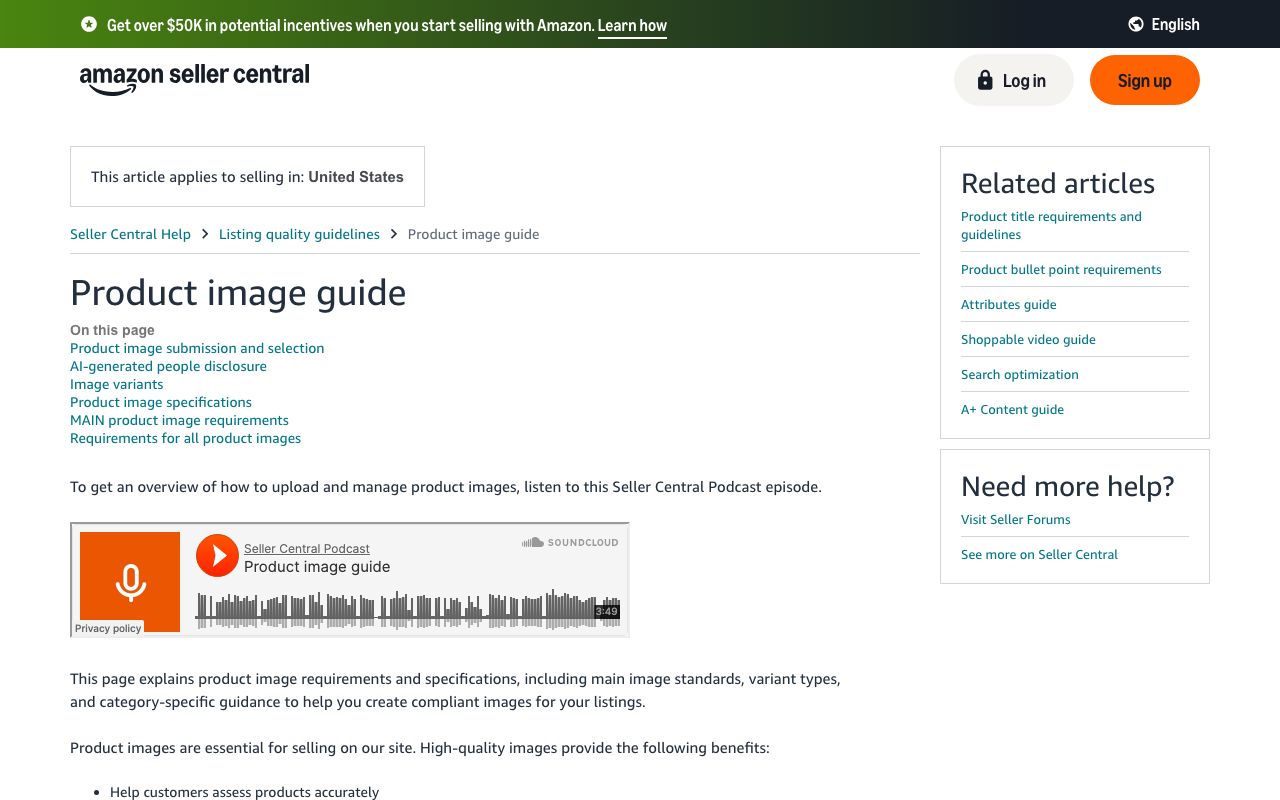
| Marketplace (checked 2026-09-06) | What the rules cover | Where AI scenes fit |
|---|---|---|
| Amazon | MAIN image standards, requirements for all images, AI-generated people disclosure | Secondary gallery images; MAIN stays a compliant product shot |
| Google Merchant Center | Minimum 500 x 500 px from 2027, 1500 x 1500 recommended, 64 MP and 16 MB caps, no promotional overlays | Main image if it shows the product accurately, no added text |
| eBay | Picture policy on borders, text and image quality; the page blocked automated reading on 2026-09-06, check it in Seller Hub | Gallery images |
| Etsy | Listing photo guidance in the help centre; the page blocked automated reading on 2026-09-06, check it in Shop Manager | Lifestyle images in the listing |
Two rules travel across every channel. Do not add text, badges or watermarks to the image itself, and do not let a generated prop imply a feature, ingredient or bundle the product does not include. The FTC's Endorsement Guides FAQ states that endorsements must be honest and not misleading, per the FTC (2026), and a scene that stages a fake customer is an endorsement.
eBay publishes its own picture policy in the Seller Center; read it in a logged-in browser, because the public URL answered our 2026-09-06 request with a bot check.
What AI prompts work for product photography?
Good AI prompts for product photography read like an art director's brief: what stays fixed, then surface, light, props, camera and framing. Exclusions go last. The formula below is what we paste into the background changer and, with a reference image attached, into text-to-image.
Keep the supplied product unchanged: shape, proportions, colours, logo, label text. Place it [position] on [surface] in [environment]. Light: [direction and quality]. Camera: [angle and height]. Props: [one or two, secondary]. Palette: [two colours]. Composition: [ratio], space on [side] for copy. No extra products, hands, new text or watermarks.
Which examples work per category?
- Skincare: 'Upright on pale limestone in a warm-white bathroom, soft window light from the left, subtle contact shadow, one folded linen towel out of focus, beige palette, vertical, clear space above.'
- Food and drink: 'Coffee bag on dark walnut in a small kitchen, warm side light, shallow depth of field, a ceramic cup and a few beans, square, space top-left.'
- Electronics: 'Headphones on a light-grey plinth, seamless neutral backdrop, large diffused light upper-right, crisp edges, front three-quarter view, wide, no props.'
- Outdoor gear: 'Insulated bottle on dry granite at sunrise, golden backlight from behind-left, distant blurred ridge, green and amber palette, vertical, headline space at top.'
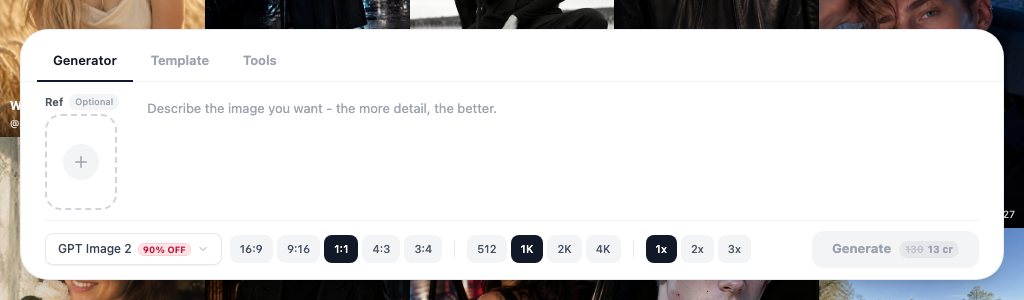
For scenes that need the product re-rendered at a new angle, attach the photo as a reference in GPT Image 2, which takes text plus reference images and outputs up to 2K per its model page; it was also the model behind 127 of 181 external generations in LazyKiwi's August 2026 workbench data. When you need several references at once, for example three angles of the same bottle, WAN 2.7 Image Pro reads up to nine images in one run. Re-rendered products still need the label checked against the source.
How to adapt AI product photos for Amazon, Shopify, Instagram and ads
AI product photography for ecommerce starts from the destination. Square is the default for a reason: in LazyKiwi's workbench data (August 2026), 1:1 was the ratio on 124 of 143 external image jobs. Each channel wants a different ratio, a different amount of scene and a different tolerance for text, so generate per channel rather than cropping one hero image four ways.
| Channel | Ratio and size | Background | Text on image |
|---|---|---|---|
| Amazon gallery | 1:1, large enough to zoom | White MAIN image; scene images secondary | None on MAIN |
| Shopify product page | 1:1 or 4:5, consistent across the catalog | Neutral or brand surface | Avoid; use page copy |
| Instagram feed and Reels | 4:5 feed, 9:16 Reels | Lifestyle scene, product still dominant | Add in the app, not the image |
| Paid social and display ads | 1:1 and 9:16 variants | Stronger mood, negative space for headline | Overlay in the ad builder |
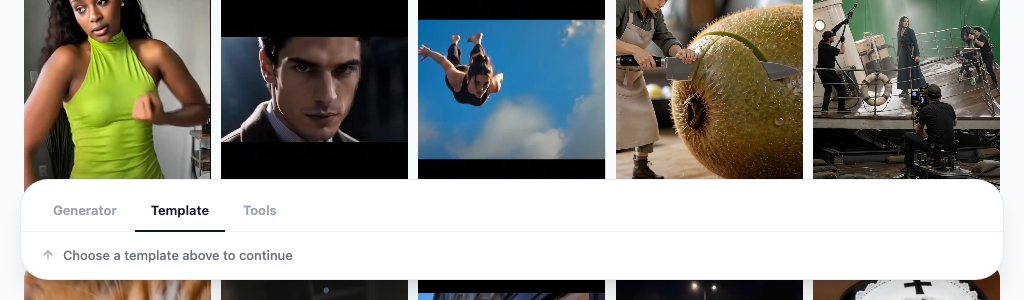
Build a small scene system per product line: one neutral, one in-use, one campaign. Reuse the same light direction, surfaces and palette across the line so a set of generated images reads as one shoot. For a product page hero that moves, the product reveal video template turns the approved still into a short clip without a second prompt.
Is there a free AI product photography tool?
Searches for AI product photography free usually mean no card and no watermark. New accounts land on the LazyKiwi Free plan, 40 credits a month and nothing to pay, per the pricing page. At the 13-credit price the product image generator and background changer showed on 2026-09-06, that covers a handful of runs a month; the paid plans list no-watermark exports and more credits.
| Tool (checked 2026-09-06) | Entry price | What you get | Notes |
|---|---|---|---|
| LazyKiwi Free plan | Free, 40 credits a month | Product image generator, background changer, upscaler, image models | Credits shared across every tool |
| Pebblely | Lite US$9 a month | 30 images a month, 40+ background themes, custom prompts | Basic plan lists 200 images for US$19 |
| Photoroom | Free start; Pro free trial | Background removal, AI backgrounds, product staging | Pro lists 8,000 AI credits and 1,000 exports |
| Canva and Adobe Express | Not verified | Template-based product mockups | Pricing pages blocked automated checks |
Pebblely lists its Lite plan at US$9 a month for 30 images and Basic at US$19 for 200, per Pebblely pricing (2026). Photoroom's pricing page offers a free start and a free trial of Pro, which lists 8,000 AI credits and 1,000 exports, per Photoroom pricing (2026). Both are dedicated product tools; LazyKiwi's advantage is that the same credits also run the image models and video templates.
What mistakes make AI product photos unusable?
A product photo generator fails in predictable ways, and most of them are visible only at full size next to the source photo. This is the review list we run before anything is uploaded.
- Changed shape or label: a redrawn cap, a moved button, a misspelled ingredient. Fix: keep the product pixels from the photo; re-render only when a new angle is essential, then compare.
- Wrong scale: a mug the size of a bucket next to a generated chair. Fix: name a familiar prop at true scale in the prompt.
- Fake reflections and floating products: a shadow that points the wrong way or no contact shadow at all. Fix: describe the light direction that matches the source photo.
- Banned backgrounds on MAIN images: a lifestyle scene uploaded as the primary marketplace image. Fix: white MAIN, scenes as gallery.
- Implied claims: generated fruit next to a supplement, a second item that looks bundled. Fix: props that cannot be read as ingredients or contents.
- Text baked into the image: prices, badges, watermarks. Fix: add text in the channel's own tools.
- Over-glossy everything: plastic-looking metal and glass. Fix: name the material and 'matte' or 'satin' where true.
A beautiful image that changes the product is a returns problem, not a marketing asset.
— LazyKiwi creator playbook
Key takeaways
- Keep the product pixels from a real photo and generates only the scene; the product image generator and background changer in LazyKiwi both do this from one upload.
- On 2026-09-06 a run of either the product image generator or the background changer was priced at 13 credits with a promotion showing; new accounts get 40 credits a month on the Free plan.
- Google Merchant Center requires at least 500 by 500 pixels from January 31, 2027 and recommends 1500 by 1500; Amazon's guide separates MAIN image rules from gallery rules and adds an AI-generated people disclosure section.
- Prompt in art-director order: what stays fixed, surface, light direction, one or two props, camera, ratio, exclusions; upscale last, export one composition per channel.
- Pebblely starts at US$9 a month for 30 images and Photoroom offers a free start, but neither shares credits with image models and video templates the way one LazyKiwi account does.
Commercial Imagery Editor
Elena Vasquez
I came from product and property photography, so I care about the boring parts: scale, shadows, disclosure rules, and what a listing platform will reject.
FAQ
Common questions
Can I use AI product photos on Amazon?
Yes for gallery and lifestyle positions, provided the product itself is unchanged and the scene does not imply extras. The MAIN image must still meet Amazon's MAIN image requirements, so keep that one a compliant white-background product shot and use generated scenes as secondary images. Amazon's guide also has an AI-generated people disclosure section; read it before staging a person.
How do I get a white background product photo with AI?
Upload a phone photo to the AI product image generator, type 'white studio background with soft contact shadow', pick 1:1 and 2K, and generate. The tool keeps the product and replaces the surroundings, which is safer than cutting out and pasting. Check the edges of glass, metal and thin straps at full size, then upscale if the marketplace zoom view needs more pixels.
Is AI product photography free?
Partly. The LazyKiwi Free plan gives every new account 40 credits a month with no card, and a product image generator run was 13 credits on 2026-09-06, so a few images a month are free and regular use needs a paid plan. Pebblely's cheapest listed plan is US$9 a month for 30 images; Photoroom offers a free start and a Pro trial. Check watermark and licence terms before publishing.
Does AI change my product's details?
It can, and that is the main risk. Tools that keep the uploaded pixels, such as the background changer, leave the product alone and only replace the scene. Text-to-image with a reference, such as GPT Image 2, re-renders the product and may alter labels, caps or proportions. Always compare the output with the source photo at 100 percent and reject anything where a buyer-relevant detail moved.
What prompts should I use for product photography?
Start with a preservation line ('keep the supplied product unchanged, including label text'), then surface, environment, light direction and quality, camera angle, one or two secondary props, palette, ratio and space for copy, and finish with exclusions such as no extra products, hands or text. Match the light direction to the original photo so the shadow agrees with the highlights.
Turn one phone photo into a listing set
Upload a product photo, get the white-background version, then swap in a branded scene and upscale before export, all inside one workbench.
Keep reading

What Is AI UGC? How AI User-Generated Content Ads Work
AI UGC is creator-style ad video made with synthetic presenters. What it is, how it differs from real UGC, how the clips are produced, tool prices, and the FTC rules.
8 min read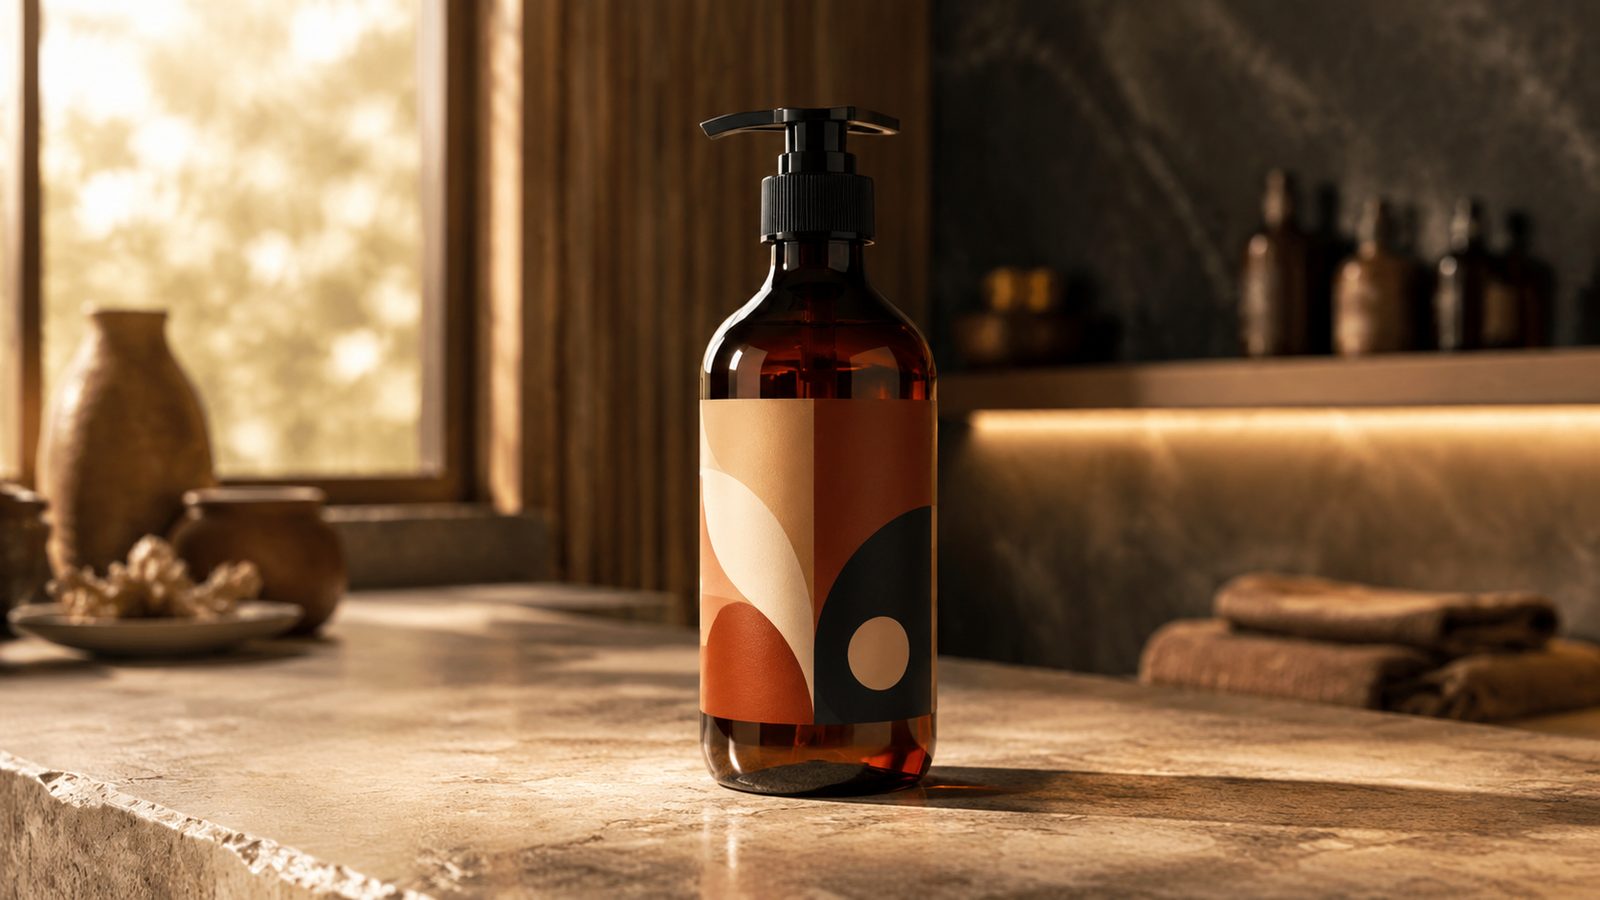
AI Mockup Generator: Make Product and Apparel Mockups Fast
An AI mockup generator builds the scene around your real design instead of a fixed template: the LazyKiwi route, six tools compared, prompts that hold up.
8 min read
AI Real Estate Photo Editing: A Workflow Agents Can Trust
AI real estate photo editing that stays on the right side of the line: exposure fixes, clutter removal, labelled virtual staging, a pre-publish checklist.
7 min read
Best AI Interior Design App in 2026: 7 Tools Compared
The best AI interior design app depends on the job: LazyKiwi, Homestyler, Planner 5D, RoomGPT, REimagineHome, Spacely and Collov compared, prices read now.
8 min read