
How to Make a Poster That Reads From Across the Room
How to make a poster people take in at a glance: one message, a clear hierarchy, text you can trust, and the print sizes, bleed and resolution to ask for.
 Maya Chen 7 min read
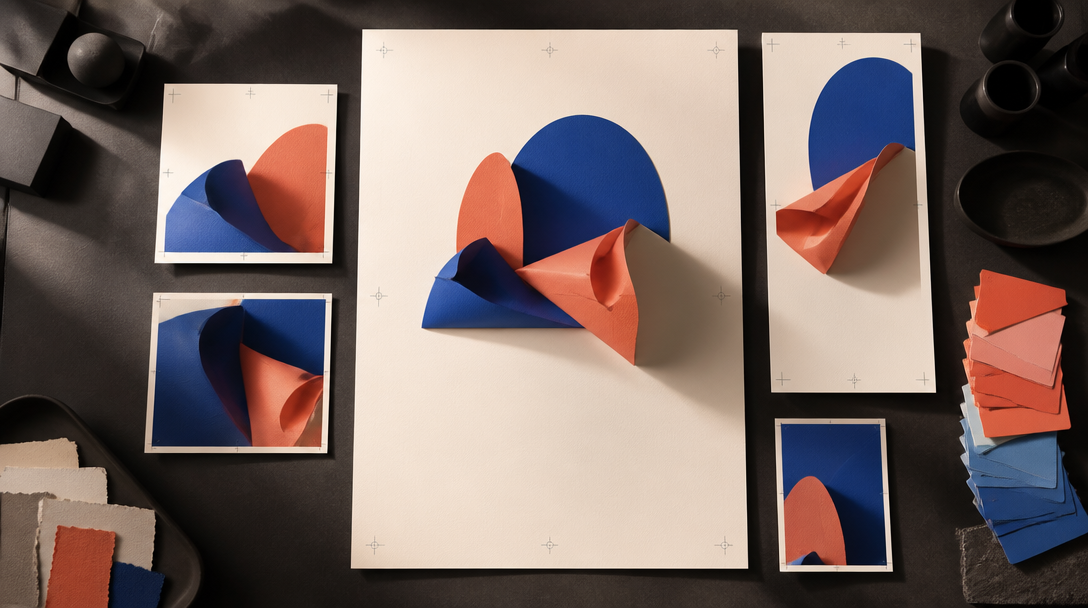
A poster gets about as long as it takes someone to walk past it. In that time it has to say one thing — what is happening, when, and why they should care — and look good enough that they stop. This guide covers how to make a poster that does that: deciding the one message, building the hierarchy, making the artwork with AI from a single photo, putting on text you can trust, and getting the file print-ready at the right size. Product details were checked against LazyKiwi's live tool pages on 8 November 2026.
Decide the one thing the poster must say
Before any design, write the poster as a sentence: "Summer night market, Saturday 14 June, Riverside Park, free entry." Everything on the poster is either that sentence or support for it. If you cannot write it in one line, you are making two posters.
Then list what has to be on it, in order of importance:
- Headline — the event, product or offer, in as few words as possible.
- Image — one picture that makes the headline feel real: the band, the dish, the product, the venue.
- Details — date, time, place, price. Only what someone needs in order to act.
- Action — a ticket link, a QR code, "walk in", "book at the bar".
Everything else — sponsor logos, a paragraph about the event's history, three hashtags — goes on the website or in the caption.
Build the hierarchy: headline, image, details
Hierarchy is the order the eye reads things in, and you control it with size, contrast and space. A passer-by should get the headline from across the room, the image from a few steps away, and the details only once they walk up to it.
| Element | Job | Rule of thumb |
|---|---|---|
| Headline | Stop people | The biggest thing on the poster; readable from several metres; five words or fewer |
| Image | Make it real | One focal subject, with clear space left where the headline sits |
| Details | Let them act | Grouped in one block: date, time, place, price |
| Call to action | Close the loop | Short and specific; a QR code needs a quiet margin around it |
| Logo | Say who | Small, usually in a corner, never competing with the headline |
Two habits improve most posters immediately: use one or two typefaces at most, and leave more empty space than feels comfortable. From a distance, a crowded poster reads as noise.
How to make a poster with AI from one photo
The slow part of poster design is composing the artwork: placing the subject, setting the colour and leaving room for the words. That is the part AI does well. In LazyKiwi's AI poster generator you upload one photo — a product shot, a band photo, the venue — describe what the poster is for, and get a composed layout with space reserved for your headline. You can also start from a description alone and let the AI create the imagery.
- 1
Upload the photo the poster is about
Use the sharpest version you have. Your photo stays the subject, so the poster is built around your product or artist, not a stock picture of someone else's.
- 2
Describe the occasion, the mood and the layout
Concrete beats clever: "summer market poster, warm colours, wide blank strip at the bottom for the date" or "vintage gig print, two colours, big blank title area at the top". Say the shape as well — portrait for print, square or 9:16 for social.
- 3
Generate a few directions
Run the same brief again for a different composition, or change one word — the colour, the era, the crop — to steer the next one. Keep the version with the clearest focal point and the cleanest title space.
- 4
Download and add your exact wording
Download the high-resolution file and put the headline and details into the space you asked for, as the next section explains.
For film-style key art, the AI movie poster template turns one photo into streaming-series artwork with title and tagline placeholders, and the animated poster template builds a moving film poster over your photo for stories and reels.
Putting the text on: when to let AI write it
Image models can now render short wording, and the poster generator will try to set the text you describe. But AI-generated type is still not exact every time, and a poster with the wrong date is worse than no poster. The safe split:
- Let the AI set mood words and short display headlines you can check at a glance — "NIGHT MARKET", "SALE", "LIVE".
- Add anything that must be exactly right yourself: dates, times, prices, addresses, names, links. Ask for a blank title area in the description, then add the text afterwards.
- To set text that sits naturally in the scene, use add text to photo. To fix one wrong word in a finished design without retyping it, use edit text in image, which keeps the font, colour and angle.
Proofread backwards
Read the details block word by word, then once more from the bottom up. Reading in reverse stops your brain from autocorrecting the date you already know.
Poster sizes, bleed and resolution for print
Decide the print size before you generate, because the shape decides the composition. The common sizes:
| Size | Dimensions | Shape | Typical use |
|---|---|---|---|
| A3 | 297 × 420 mm (11.7 × 16.5 in) | 1:1.41 | Shop windows, noticeboards, office walls |
| A2 | 420 × 594 mm (16.5 × 23.4 in) | 1:1.41 | Event posters, cafés, campus boards |
| A1 | 594 × 841 mm (23.4 × 33.1 in) | 1:1.41 | Large event and venue posters |
| Tabloid | 11 × 17 in (279 × 432 mm) | 1:1.55 | US flyers and small posters |
| 18 × 24 in | 457 × 610 mm | 3:4 | US event and gig posters |
| 24 × 36 in | 610 × 914 mm | 2:3 | Movie-style and large US posters |
The A sizes come from the ISO 216 standard and all share one shape, so a design made for A3 scales to A2 or A1 without re-cropping. The US sizes each have a different shape — the paper size reference lists them — so pick one before you compose.
Resolution
Printers commonly ask for around 300 pixels per inch at the final size for anything read up close. That is a lot of pixels: an A3 poster at 300 ppi is about 3,508 × 4,961 pixels, and an 18 × 24 inch poster is 5,400 × 7,200. Large posters seen from a few metres away can print well at a lower resolution, so ask your printer what they need. If your file falls short, the AI photo upscaler enlarges it up to 4x and sharpens detail.
Bleed and safe margins
Posters are trimmed after printing, and the cut is never perfectly exact. Extend the background past the trim line — the bleed, often 3 mm or 1/8 inch, but use your printer's figure — and keep text and faces well inside the edge. When you generate, ask for extra margin around the subject so nothing important ends up near the trim.
Poster checklist before you print
- The one-line message is the biggest thing on the poster.
- Date, time, place and price were typed by you and proofread twice.
- One focal image, one or two typefaces, plenty of empty space.
- The file matches the print shape, with bleed and nothing important near the trim.
- Resolution checked at the final size, and upscaled if needed.
- You have the rights to every photo, logo and font on it.
- A square or 9:16 version made for social, not squeezed from the print file.
Key takeaways
- Write the poster as one sentence first; everything on it should support that sentence.
- Control the reading order with size and space: headline from across the room, image up close, details last.
- Let AI compose the artwork from your photo with a blank title area, then add exact dates, prices and names yourself.
- Pick the print size before you generate — the A sizes share one shape, the US sizes do not — and check resolution and bleed with your printer.
- Re-make the composition for square and 9:16 instead of shrinking the print file.
Image & Design Editor
Maya Chen
I test the image tools we ship on real photos — faces, text, backgrounds — and note which edits hold up at full size and which quietly fall apart.
FAQ
Common questions
How do I make a poster for free?
Upload a photo, or start from a description, in LazyKiwi's AI poster generator; describe the occasion and where the text should go, and download the result. It is free to start with no credit card, and new accounts get free credits to try it. Add your exact wording on top afterwards.
Can AI make a poster with text on it?
Yes, it renders the wording you describe, but AI-generated type is not always exact. For anything that must be right — a date, a price, a name — ask for a blank title area and add the text yourself afterwards.
What size should a poster be?
Pick by where it will hang. A3 (297 × 420 mm) suits windows and noticeboards, A2 (420 × 594 mm) and 18 × 24 inches suit event posters, and A1 (594 × 841 mm) or 24 × 36 inches suit large venue and movie-style posters. Decide before you design, because each shape needs its own composition.
What resolution does a poster need for printing?
Printers commonly ask for about 300 pixels per inch at the final size for posters read up close — roughly 3,508 × 4,961 pixels for A3. Large posters viewed from a distance can use less. Check with your printer, and upscale the file if it is short.
How do I make a poster from a photo?
Upload the photo the poster is about, describe what it is for and where the text should go — for example "gig poster, two colours, blank title area at the top" — then generate a few versions and download the one with the clearest focal point and title space.
What is bleed on a poster?
Bleed is extra background that extends past the trim line, so no white sliver shows if the cut is slightly off. Printers often ask for about 3 mm or 1/8 inch; use your printer's figure and keep text and faces inside a safe margin.
Make your poster from one photo
Upload an image, describe the poster and the space you need for the words, and download a composed design you can print or post.
Keep reading
9 Canva Alternatives for 2026: Free and Paid Tools Compared
Nine Canva alternatives compared on pricing checked today, free tiers and AI features, plus a one-brief test you can repeat in Figma, Express and LazyKiwi.
10 min read
How to Make a YouTube Thumbnail With AI (Step by Step, 2026)
How to make a YouTube thumbnail with AI in six steps: pick the frame, generate with title space, add text, export to YouTube's spec and A/B test the result.
7 min read
How to Edit Text in an Image With the Same Font
Edit text in an image with the same font: change a date, price or line in a photo, keep its typeface, colour and angle, and rebuild the background.
9 min read