
Content Repurposing: Turn One Photo Into a Week of Posts
Content repurposing from one photo: pick a source that survives recuts, run seven multiply steps in LazyKiwi, and post a Day 1 to Day 7 plan on three apps.
 Priya Sharma 11 min read
Content repurposing is the practice of making one asset do the work of many: a single photo becomes a Reel, a TikTok, a Short, a carousel and a loop, each cut and treated differently enough that the audience sees a series, not a repeat. This is the version of that idea we run from one photograph. It covers which source photos survive the treatment, the seven multiply steps in LazyKiwi with the tool for each, a Day 1 to Day 7 plan with ratios per platform, the schedulers that make batch creating stick, and the checks that stop a batched week from looking batched.
What is content repurposing and why batch from one photo?
Content repurposing means taking work you have already made and reshaping it for another format, platform or audience. Most guides start from a long video or a blog post. Starting from a photo is stricter and, in practice, faster: there is no transcript to mine, only one image and a set of transformations, so the week is produced in one sitting rather than assembled over several.
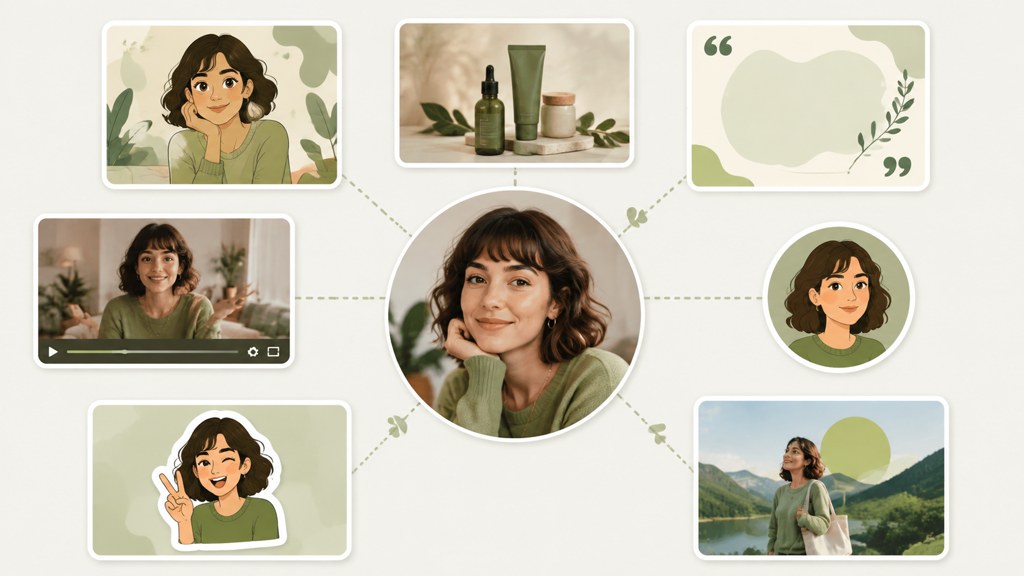
The reason to batch is the blank page. Daily creation makes you pay the full cost of ideation, production and doubt every morning; content batching pays it once, on a day you chose, and leaves the other six days for posting and replying. That is the whole argument. Any claim that batching also improves reach needs a source, and the platforms do not publish one, so this guide makes no such claim.
| Approach | Creative decisions per week | Assets to source | Risk |
|---|---|---|---|
| Seven one-off posts | Seven briefs, seven shoots, seven edits | Seven | Skipped days when one shoot fails |
| One photo, seven treatments | One brief, one photo, seven transformations | One | A week that reads as the same post seven times (fixed in the last section) |
A week of posts needs three things from that one photo: motion for the video feeds, a change of look for the second and third viewing, and three aspect ratios so nothing is cropped by an app. The seven steps below are ordered to produce exactly those.
How to pick a source photo that repurposes well
A weak source multiplies into seven weak posts, so the photo choice is the only decision in this workflow that deserves real time. Pick for range, not for beauty.
- One subject: a person, a product or a single object. Two subjects fight for the frame once you recut to 9:16.
- Empty space around the subject: room to add motion, to extend the background, and to crop to 4:5 and 1:1 without losing a hand or a logo.
- A background that can change: a plain or softly blurred backdrop restyles cleanly; a busy street becomes noise in an anime pass.
- Sharp and well lit: every transformation copies what it sees at the edges, so grain, blur and blown highlights get multiplied too.
- Rights you hold: your own photo, or one you have written permission to transform; stock licenses often forbid derivative use.
Then prepare it once. Run a small or old photo through the AI photo upscaler, which enlarges up to 4x and rebuilds edge and texture detail rather than stretching pixels; if the framing is tight, the AI image extender paints new background beyond the original border so the same shot becomes a full 9:16, 16:9 or square picture with the original pixels untouched.
Do the upscale first and the extend second. Extending a soft image gives the model soft edges to copy; extending a sharp one gives you a clean 9:16.
How to repurpose one photo into seven posts step by step
How to repurpose content from a single image, in the order that keeps each output distinct. Every step names the LazyKiwi tool or template and what it returns; run all seven in one session and you have the week.
- 1
Animate the photo (image to video)
Open the AI video generator in image mode and choose Kling v3 Omni. It takes one image, renders 3 to 60 seconds at 720p or 1080p in 16:9, 9:16 or 1:1, and accepts a motion prompt of up to 2,500 characters. A 5-second 720p clip is 829 credits at the current sale price, 1,036 at 1080p. Keep the motion small: a push-in, fabric moving, a head turn.
- 2
Apply an effect template
Drop the same photo into a camera-move or effect template from the video hub (a bullet-time freeze, a zoom-out reveal, a tracking shot). The subject is unchanged; the motion design is what the viewer remembers, which is why this post looks nothing like Day 1.
- 3
Build a start-to-end transformation
Two routes. In Kling v3 Omni, upload the original as the start frame and a restyled version as the end frame; frame-to-frame runs 3 to 15 seconds. Or use the then vs now transition, which takes two portraits and returns a 10-second 9:16 morph timed to a beat, with no cut and no face swap.
- 4
Restyle the still
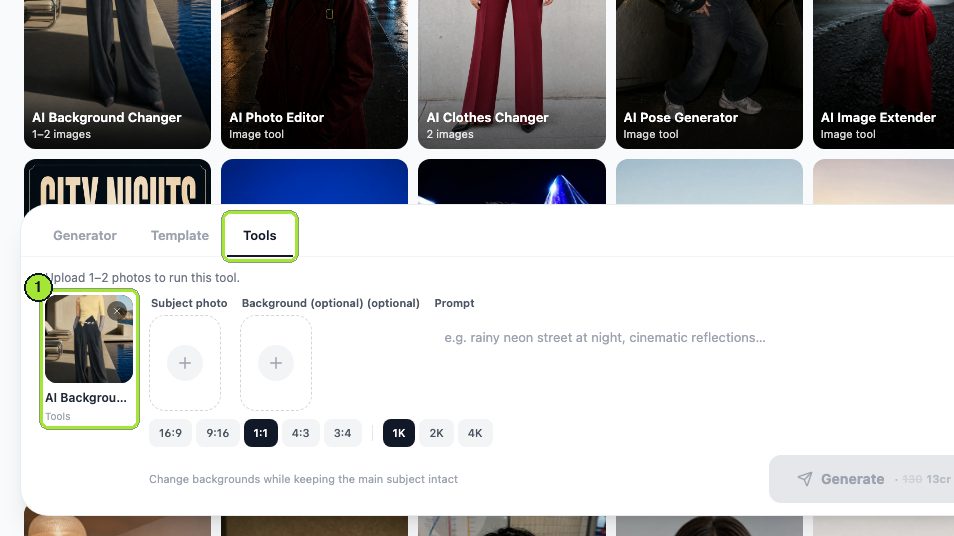
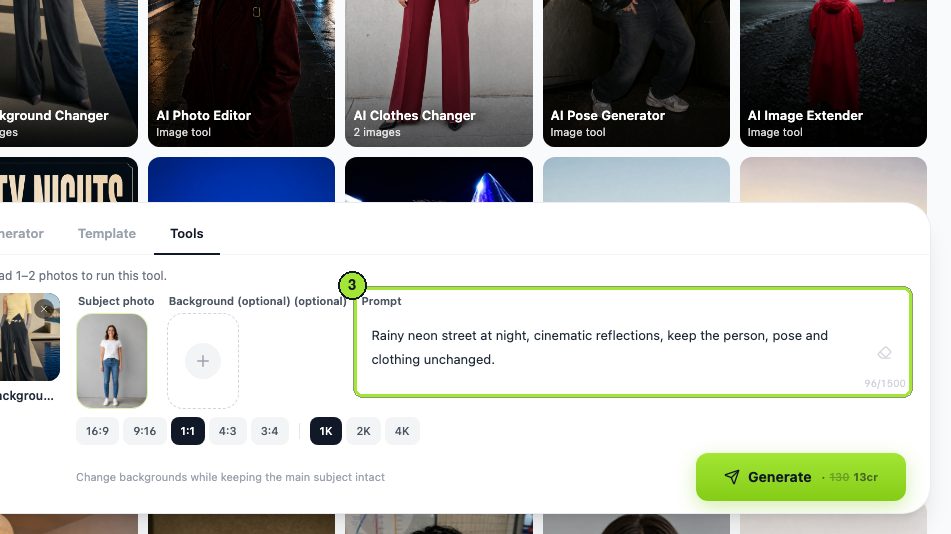
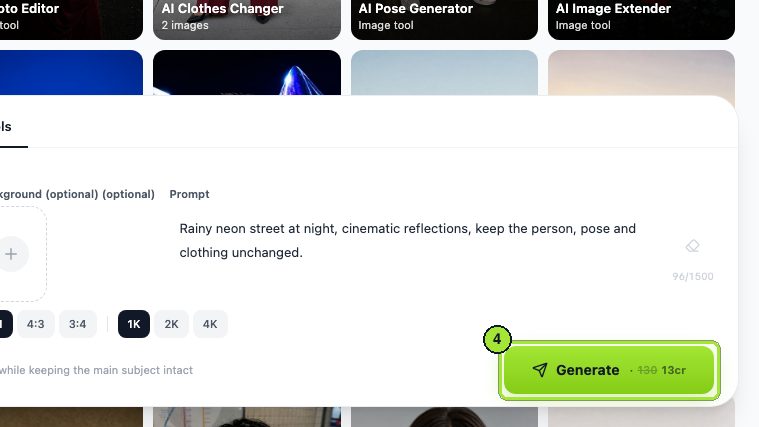
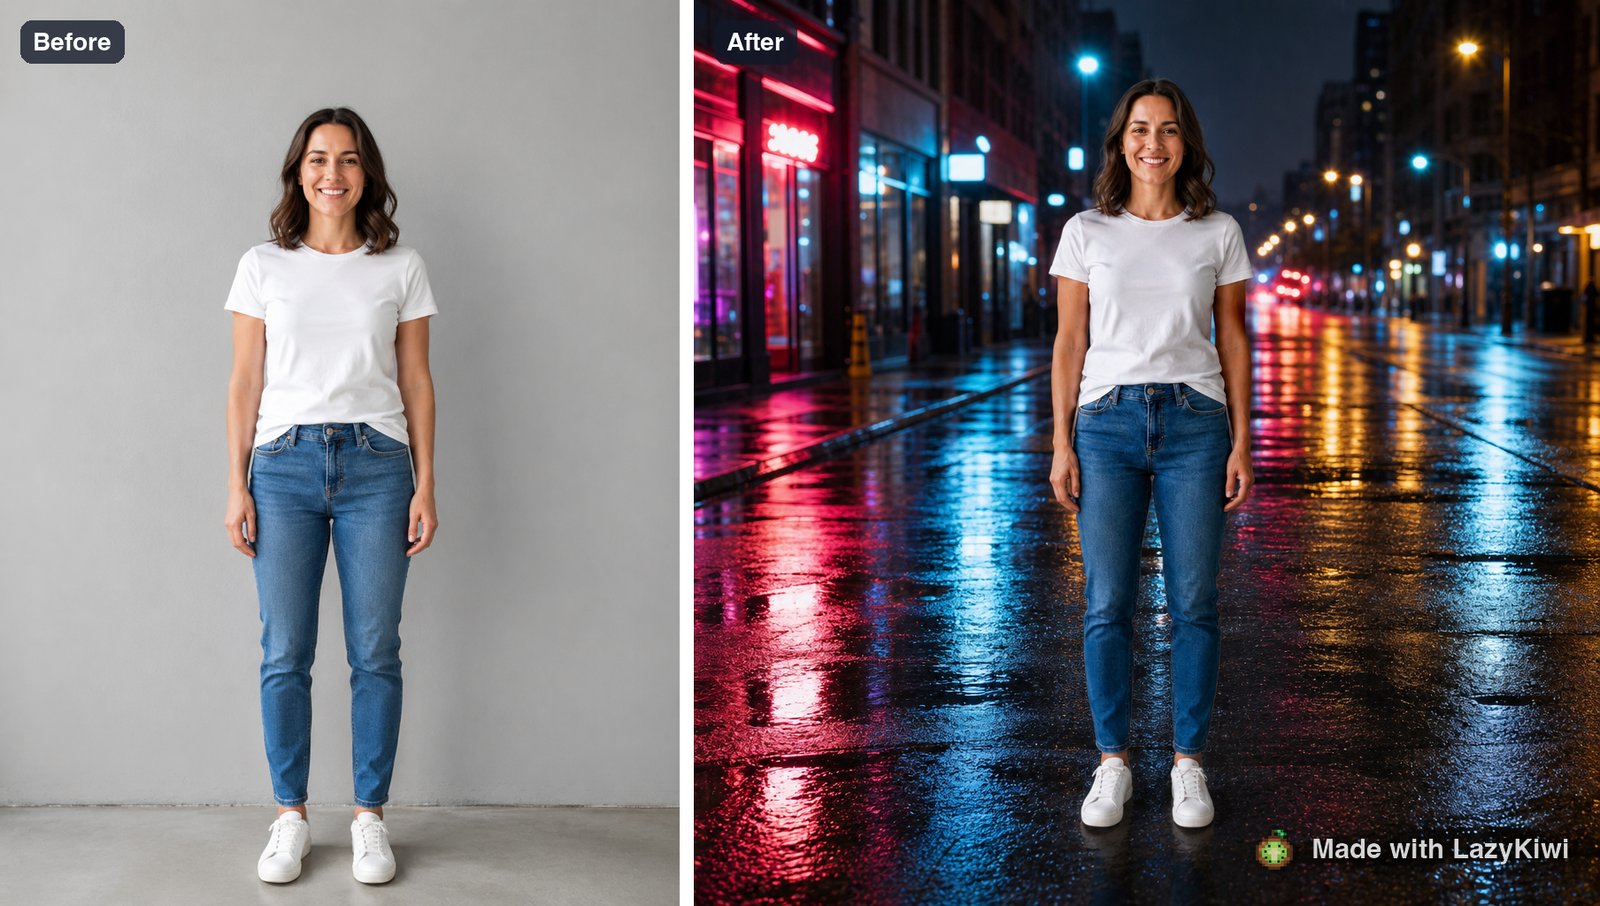
In the AI image generator, use image-to-image with the photo as the reference and ask for one clear look (film still, watercolor, editorial flash). Or swap only the scene with the AI background changer, which lifts the subject out, rebuilds hair edges and shadows for the new light, and accepts either a described or an uploaded backdrop.
- 5
Recut the ratios
Use the image extender to produce a 9:16 for Stories, Reels, TikTok and Shorts, a 4:5 for the Instagram feed and a 1:1 for the grid, all from the same frame. Extending beats cropping because nothing is lost.
- 6
Assemble a carousel or a collage
Three restyles from step 4 make a carousel. For a single moving post, the AI photo collage template takes exactly three images, uses the second as the centre panel and the background, and returns a short animated collage.
- 7
Cut a loop
Trim the strongest two seconds of the Day 1 clip so the last frame meets the first, export it as a short loop or GIF from your editor, and keep it for replies, Stories and the end of the week.




What is a realistic Day 1 to Day 7 posting plan?
This is the schedule we use, with a different multiply method every day and the platforms rotated so no app sees the same treatment twice in a row. Ratios follow the platform specs in the next section.
| Day | Post | Method (step) | Where | Ratio |
|---|---|---|---|---|
| 1 | Hero animation | Image to video with Kling v3 Omni (1) | Reels and TikTok | 9:16 |
| 2 | Effect hook | Camera-move or effect template (2) | Shorts | 9:16 |
| 3 | Restyled still | Image-to-image restyle (4) | Instagram feed | 4:5 |
| 4 | Transformation | Start-to-end frames or then vs now (3) | TikTok and Reels | 9:16 |
| 5 | Second effect | A softer template than Day 2 (2) | Reels | 9:16 |
| 6 | Carousel or collage | Three restyles or the collage template (6) | Instagram feed | 4:5 or 1:1 |
| 7 | Loop and best-of | The two-second loop plus a recut of the top performer (7, 5) | Stories, then wherever Day 1 to 6 did best | 9:16 |
Days 1 and 4 are the two that carry the week; if credits are tight, make those two in video and keep Days 3, 5 and 6 as stills and templates. A still with a strong caption is a post; an unmade video is not.
How to repurpose content for Instagram, TikTok and Shorts without repeating yourself
Repurposing content for social media fails at the crop more often than at the idea. Sprout Social's image sizes guide, updated in May 2026, lists Instagram feed posts at 1080 by 1080 (1:1) or 1080 by 1350 (4:5), Stories and Reels at 1080 by 1920 (9:16) with a text-safe area of 1080 by 1610, and carousels of up to 20 images, per Sprout Social (2026). Its video specs guide gives TikTok the same 1080 by 1920 frame, per Sprout Social (2026), and YouTube defines a Short as a vertical video of up to 3 minutes at up to 1080p, per YouTube Help (2026).
| Platform | Ratio and size (verified 2026-09-05) | What changes besides the crop |
|---|---|---|
| Instagram feed | 4:5 at 1080 by 1350, or 1:1 at 1080 by 1080 | The still or the carousel; caption carries the idea |
| Instagram Reels and Stories | 9:16 at 1080 by 1920; keep text inside 1080 by 1610 | Sound added in the app; hook line as animated text |
| TikTok | 9:16 at 1080 by 1920 | A trending sound and an on-screen question; the app's own captions |
| YouTube Shorts | Vertical, up to 3 minutes, up to 1080p | A title that reads as a search query; the loop cut works best here |
The rule that stops repetition is one change per platform beyond the ratio: a different first frame, a different sound, and a caption written for that app's reader. The Reels caption is a sentence; the TikTok caption is a question; the Shorts title is a query someone would type.
Label what needs a label. Meta applies an 'AI info' label from industry signals or self-disclosure, per the Meta Newsroom (2024); TikTok's guidelines require clear labeling when AI or editing realistically depicts people or scenes, per TikTok (2026); and YouTube asks for disclosure on realistic altered or synthetic scenes, per YouTube Help (2026). A restyle that is obviously a painting needs none of them; a background swap that could pass for a real location does.
Which tools speed up batch content creation?
Batch content creation has three stages, and the tools for each are different: make the assets, plan the captions, schedule the posts. Batching content tips that skip the third stage produce a folder of files and a week of manual uploads.
| Stage | Tool | What it does for a one-photo week | Verified 2026-09-05 |
|---|---|---|---|
| Make | LazyKiwi image tools (upscaler, extender, background changer) | Prep and recut the source; each tool page says you can upload a photo and see a result free before choosing a plan | Tool pages |
| Make | LazyKiwi video generator and templates | Days 1, 2, 4 and 5; Kling v3 Omni for image-to-video and start-to-end frames | Model page |
| Plan | A Notion page or any shared doc | One table: day, asset file name, platform, caption, sound | notion.com |
| Schedule | Buffer | Bulk upload turns a CSV into scheduled posts: 10 per channel per upload on the free plan, 100 on paid, text and single-image posts only | Buffer resources |
| Schedule | The platforms' own schedulers | Instagram, TikTok and YouTube each let you schedule from the app or Studio | In-app |
For the planning table, a Notion (2026) page is enough; the point is that the file names in the table match the exports (day-1-hero, day-4-morph). For scheduling, Buffer's bulk upload (2026) reads a CSV and turns each row into a queued post, with a cap of 10 posts per channel per upload on the free plan and 100 on paid plans; it handles text and single-image posts, so the still days go through it and the video days are scheduled in each app. That split is the step that makes batch creating stick after the first enthusiastic week.
One licensing note. Everything above assumes the source photo is yours. Transforming a stock image, a client's product shot or a photo of another person into seven posts needs the rights to make derivatives, and most stock licenses and all portrait subjects have an opinion about that.
What makes batched content feel repetitive?
Batching only works if the audience cannot tell. The failure is seven posts that open on the same frame with the same sound, which reads as one post on a loop. Each row below is a choice you make once per week.
| Feels like a repeat | Feels like a series |
|---|---|
| The same first frame every day | A different first frame per post: motion on Day 1, an effect on Day 2, a new look on Day 3 |
| One effect template reused | Rotate animation, effect, restyle, transformation and collage |
| Identical captions and audio | A caption written for each app and a new sound on each video day |
| Variations posted back to back | Video days and still days alternated; the loop saved for last |
| Every post at 9:16 | 4:5 and 1:1 on the feed days so the grid does not show seven identical crops |
Get this right and one photo carries a week without anyone noticing the shared origin, and next week's creative budget goes into choosing the next photo rather than into filling seven blank pages.
Key takeaways
- Content repurposing from one photo produces seven posts in one session: animate, effect, transform, restyle, recut, collage, loop, each with a named LazyKiwi tool.
- Prep the source once: the AI photo upscaler enlarges up to 4x, and the AI image extender paints new background so the same frame becomes 9:16, 4:5 and 1:1 without cropping.
- Kling v3 Omni animates a still for 3 to 60 seconds at 720p or 1080p, and runs start-to-end frames for 3 to 15 seconds; a 5-second 720p clip is 829 credits at the current sale price.
- Platform sizes that matter: Instagram feed 1080 by 1350 (4:5) or 1080 by 1080, Reels and TikTok 1080 by 1920 with text inside 1080 by 1610, Shorts vertical up to 3 minutes.
- A batched week reads as a series only if the first frame, the sound and the caption change per post; Buffer's bulk upload schedules the still days from one CSV and the apps schedule the video days.
Creator Growth Editor
Priya Sharma
I study what makes short-form content spread, then turn the pattern into something you can repeat on a Tuesday afternoon without a studio.
FAQ
Common questions
How many posts can you make from one photo?
Seven is the working number, one per multiply method: an image-to-video clip, an effect template, a start-to-end transformation, a restyle, three ratio recuts, a carousel or collage, and a loop. Each ratio recut can also become its own post, so a strong photo stretches past seven without any method being reused.
Is repurposing content bad for reach?
The platforms do not publish data on it, and this guide makes no reach claim either way. What they do state is that unlabeled realistic AI edits and reposts that add only a watermark or a border are treated as low-value; a transformed post with a new first frame, sound and caption is not a repost, it is a new post from the same source.
How do I batch content for Instagram?
Make the assets in one session, then fill a table with day, file name, ratio, caption and sound before you schedule anything. For Instagram specifically, plan two feed days at 4:5 or 1:1, four Reels days at 9:16 with text inside the 1080 by 1610 safe area, and one Stories day for the loop; schedule from the app or a bulk-upload tool.
What is the difference between repurposing and reposting?
Reposting publishes the same file again, possibly with a border, a watermark or a credit added. Repurposing changes the work: a still becomes motion, a scene becomes another scene, a 16:9 frame becomes an extended 9:16. The test is whether a viewer who saw the first post gets something new from the second.
Which aspect ratios do I need for a week of posts?
Three. 9:16 at 1080 by 1920 covers Reels, Stories, TikTok and Shorts; 4:5 at 1080 by 1350 covers the Instagram feed and carousels; 1:1 at 1080 by 1080 covers the grid and any square placement. Produce all three from the source with the image extender rather than cropping, so the subject stays whole in each.
Make this week's posts from one photo
Upload a single photo to the LazyKiwi video generator, animate it with Kling v3 Omni, then run the restyle, recut and collage steps in the same session. The 40 free credits cover the still-image steps.
Keep reading
25 Faceless YouTube Channel Ideas You Can Start Today
Find a realistic faceless YouTube niche, validate your concept, and turn simple scripts, visuals, narration, and editing into consistent videos.
8 min read
How to Make an AI Video From a Photo Without Weird Motion
Learn how to make an AI video from a photo using controlled movement, practical prompts, and settings that help keep faces, products, and backgrounds consistent.
8 min read
How to Make Scroll-Stopping AI Effect Videos for TikTok, Reels & Shorts
How AI effects build a hook people can't scroll past, plus a workflow you can run even if you have never touched an editor.
8 min read
25 YouTube Shorts Ideas You Can Make Without Showing Your Face
Turn these practical YouTube Shorts ideas into engaging faceless videos using screen recordings, captions, AI visuals, narration, and simple edits.
8 min read