
Car Photography: Angles, Light and Clean Edits
Car photography that sells: the five angles a buyer expects, the light that hides reflections, and the edits you may and may not make to a listing photo.
 Elena Vasquez 9 min read
Car photography is a reflection problem before it is a camera problem. A car is a curved mirror parked outdoors, so what lands on the paint is whatever is above and around it: sky, buildings, you. Choose the light and the location for that reason, shoot the five angles a buyer expects, and keep the editing to the background. This covers the shot list, the two hours of the day that do the work, the phone version, and the line you do not cross when a car is for sale.
What angles does a car photo set need?
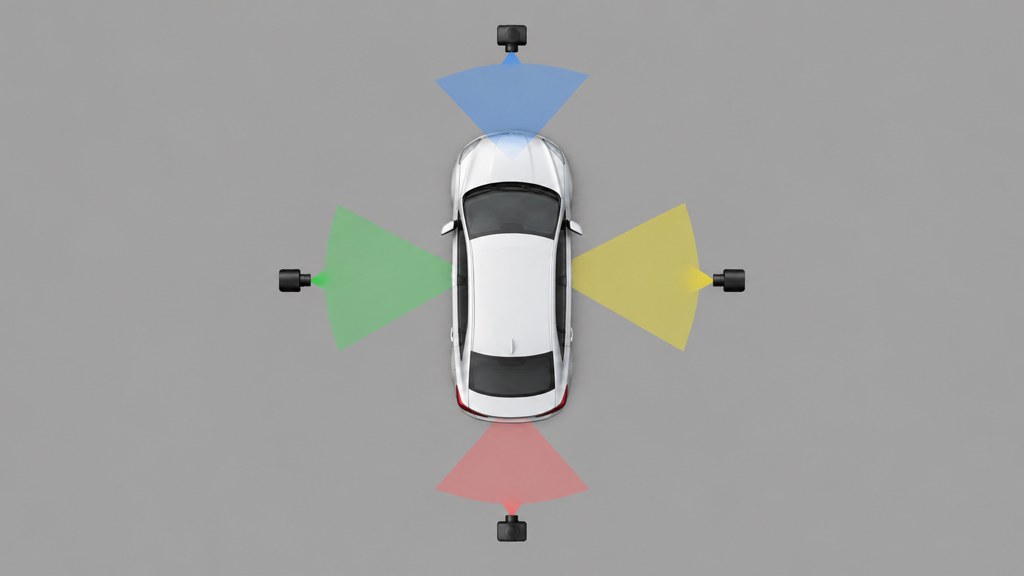
Five frames are the minimum for a listing. Two more turn a listing set into an enthusiast set.
- 1
Three-quarter front
The hero frame. Stand off the front corner so you see the front and one flank at once. Turn the front wheels toward you so the face of the wheel shows rather than the tyre edge.
- 2
Three-quarter rear
The opposite corner, same rules. This is the frame that shows the rear lights and the shoulder line together.
- 3
Full side profile
Square to the flank, camera at wheel-arch height, far enough back that the ends do not stretch. This one carries the shape and it is where the wrong lens shows most.
- 4
Interior from the driver's door
Door open, camera roughly at the headrest, taking in the wheel, dash and centre console in one frame.
- 5
Dash and odometer
Ignition on, screen readable, mileage sharp. For a sale this is a document, not a picture.
- 6
Detail extra: wheel and tyre
One wheel filling the frame. Buyers read kerb damage and tread from this before they read anything you wrote.
- 7
Detail extra: badge, stitching or engine bay
The frame that says somebody cared. Optional for a listing, essential for an enthusiast set.
Shoot the same seven for every car and the set becomes comparable. Consistency is what makes a run of listings look professional, and it costs nothing but discipline.
What time of day should you photograph a car?
Overcast light and the hour around sunset beat bright midday, and the reason is size rather than brightness. A cloud layer is an enormous soft source, so its reflection stretches across a curved panel as a smooth gradient. A midday sun is a tiny hard source, so it reflects as a searing white blob with black shadows either side of it.
- Heavy overcast is the easiest condition there is for paintwork, especially on black and dark blue.
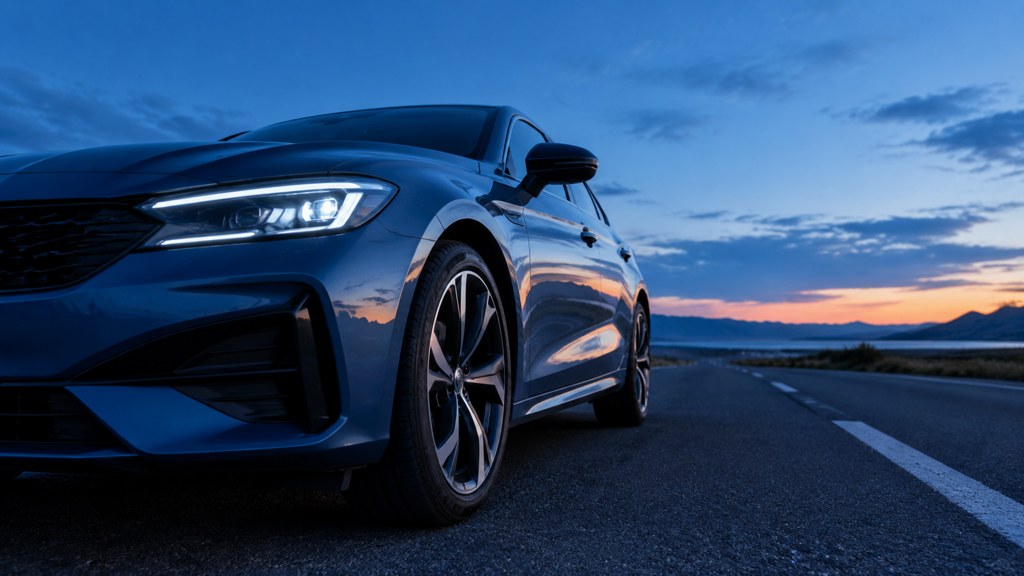
- Blue hour, the twenty minutes after sunset, gives you an even sky above and the option of lighting the interior separately.
- Golden hour works but demands positioning: put the low sun behind or across the car rather than behind you, or you will be in the paint.
- Midday sun is the only condition worth avoiding outright. Adobe's own car photography guide recommends the hour after sunrise and before sunset, or shade from trees and buildings, for exactly this reason (Adobe car photography guide, checked 2026-09-07).
If you can only shoot at midday, find a large open shade: the north side of a big building, or under a bridge. You are not looking for darkness, you are looking for a bigger, softer source above the car.
How do you stop reflections ruining car photos?
You cannot remove reflections. You can choose what gets reflected, which is the whole skill.
- Pick the location by what is above and beside the car, not by what is behind it. An empty sky and a clear horizon are worth more than a scenic backdrop.
- Move yourself. Your own reflection lands in the door and the flank; shooting from a lower or more oblique angle usually pushes it out of frame faster than any filter.
- Use a circular polariser deliberately. It cuts glare on glass and paint, and the same Adobe guide is blunt that without one you will get reflections coming off the windscreen and the side of the car (checked 2026-09-07). Rotate it while watching the paint rather than setting it once.
- Kill the small bright things. Street lights, a white van, a shop sign. One small hard reflection on a curved panel is more distracting than a whole sky.
- Shoot the glass and the paint as separate problems. A polariser set for the windscreen is rarely the setting that flatters the flank.
Gear publications such as PetaPixel and DPReview will happily sell you a filter for this, and a polariser is genuinely useful. Position still does more work than the filter does.
How do you shoot a car with just a phone?
A phone is a wide lens held close, which is the worst combination for a large object. Every phone problem here comes from that, and every fix is about distance.
- Get low. Wheel-arch height, roughly hip level. Standing height looks down onto the roof and makes the car look small and squat.
- Step back and zoom in. Use the 2x or 3x lens from further away rather than the wide lens up close. Nikon's lens guide notes that a 50mm sits at close to the field of view the human eye sees, and the further-back-and-tighter approach is how you get near that on a phone (Nikon Learn & Explore, checked 2026-09-07).
- Keep the phone level. Tilting up or down bends the vertical lines of the car and nothing later fixes it cleanly.
- Turn off any automatic beautifying or scene mode that lifts shadows aggressively. Flat, slightly dark frames edit better than crushed ones.
- Wipe the lens. It is the single most common cause of a hazy car photograph and it takes two seconds.
One height, one distance, every car
Mark the distance in paces and keep the phone at the same height for every frame in the set. Comparable framing across a listing does more for perceived quality than any single sharper photograph.
How do you photograph a car interior?
- Open the opposite door or a window to let light in. An interior lit only through the windscreen is a cave with a bright hole at one end.
- Straighten the wheel and set the seats to a neutral position. A crooked wheel is the interior equivalent of a tilted horizon.
- Expose for the dashboard and let the windows go bright. The alternative, exposing for the windows, gives you a correct view of a car park and a black interior.
- Shoot from just outside the door with the camera at headrest height, not from the driver's seat. Inside the car you are too close to include anything.
- Clear the cabin completely. A phone cable, a parking ticket or a child's toy in the footwell undoes an hour of careful work.
Two frames per interior is usually enough for a listing: one wide from the driver's side, one of the dash and instruments. Anything else belongs in the extras.
How do you edit car photos without misrepresenting the car?
There is a clean line here and it is worth stating plainly. Car photo editing may change the setting and the light. It may not change the condition of the vehicle.
| Edit | Listing photo | Enthusiast or brand photo | Why |
|---|---|---|---|
| Exposure, contrast, white balance | Fine | Fine | Corrects the capture, not the car |
| Removing a bin, a bollard or a passer-by | Fine | Fine | Scene furniture, not part of the vehicle |
| Replacing the background entirely | Acceptable if the car is untouched and the shot is presented as a studio-style image | Fine | The subject is still the real car |
| Removing your own reflection from a panel | Fine | Fine | You were never part of the car |
| Removing a dent, scratch or kerbed wheel | Never | Only in obvious brand fantasy work, never as a record | Misrepresents the goods being sold |
| Removing a warning light or altering the odometer | Never | Never | Falsifies a document a buyer relies on |
Marketplaces publish their own photo rules on their seller pages and those rules change, so read the one you are listing on rather than trusting a summary. For anything that shades into advertising, the FTC's endorsement guides Q&A is the reference to take wording from rather than inventing your own disclaimer.
How do you replace a messy background behind a car?
A car shot against a concrete wall in a supermarket car park is the reality for most sellers. Replacing the setting while leaving the vehicle untouched is legitimate, and it is the one edit that reliably lifts a listing set.
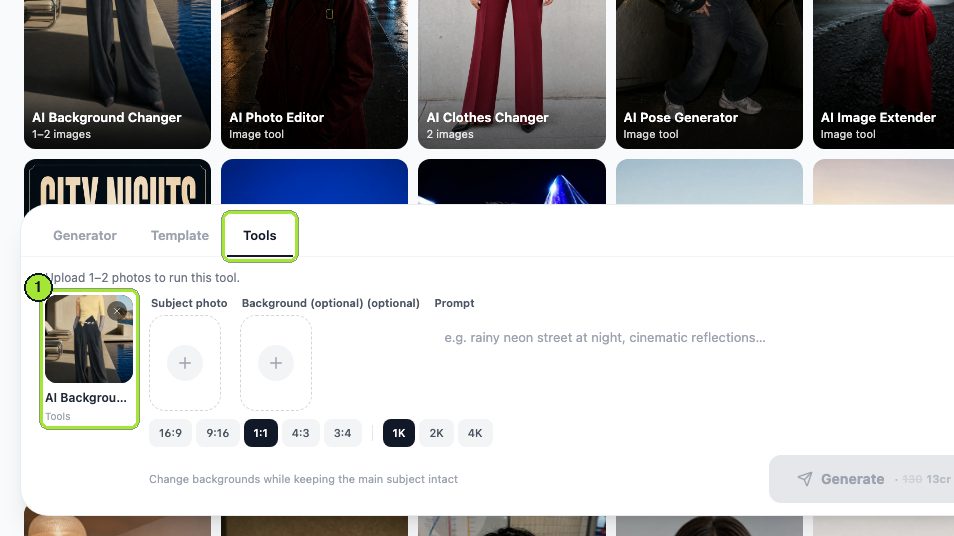
A note on what did not work first, because it matters. We started with the car window glow template, which produces a styled night scene: fed our own car photograph, it returned a stock scene with a person at a car window and ignored the vehicle entirely. It is a mood template, not a car tool. The run below uses the AI background changer instead.
- 1
Upload the car frame
The Subject photo box takes the original. Ours was a silver hatchback against a concrete wall.
- 2
Write the instruction as a preservation order
The Prompt box is where you protect the car. Name the paint, the wheels, the angle and the window reflections as things to keep, then describe the new setting.
- 3
Set the frame
The ratio chips are the only crop control. We used 16:9 at 1K for both runs.
- 4
Generate and compare
Each run cost 13 credits and the button showed that before spending. The second run changed only the prompt, from a studio backdrop to a coastal road at golden hour.
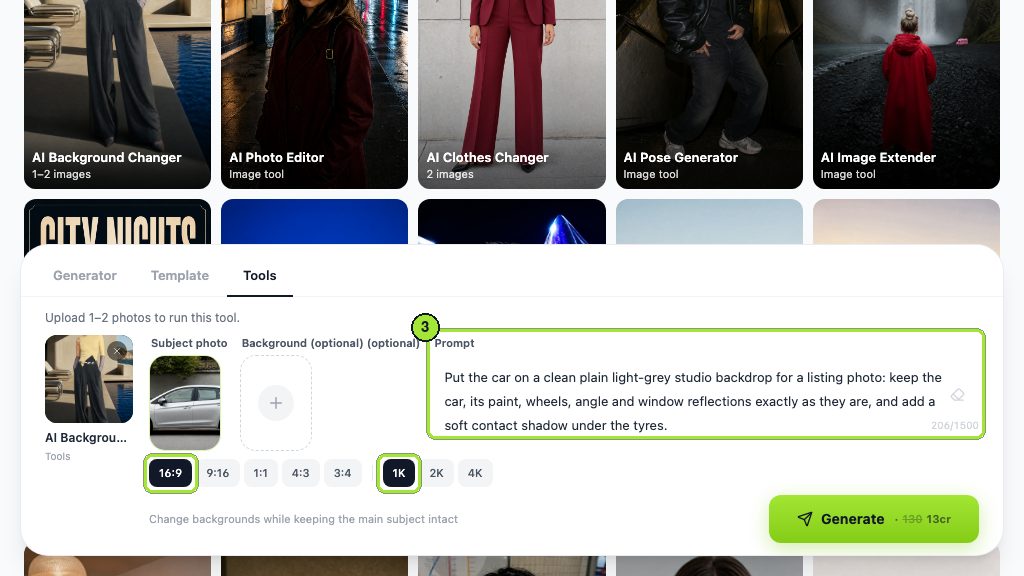
Put the car on a clean plain light-grey studio backdrop for a listing photo: keep the car, its paint, wheels, angle and window reflections exactly as they are, and add a soft contact shadow under the tyres.
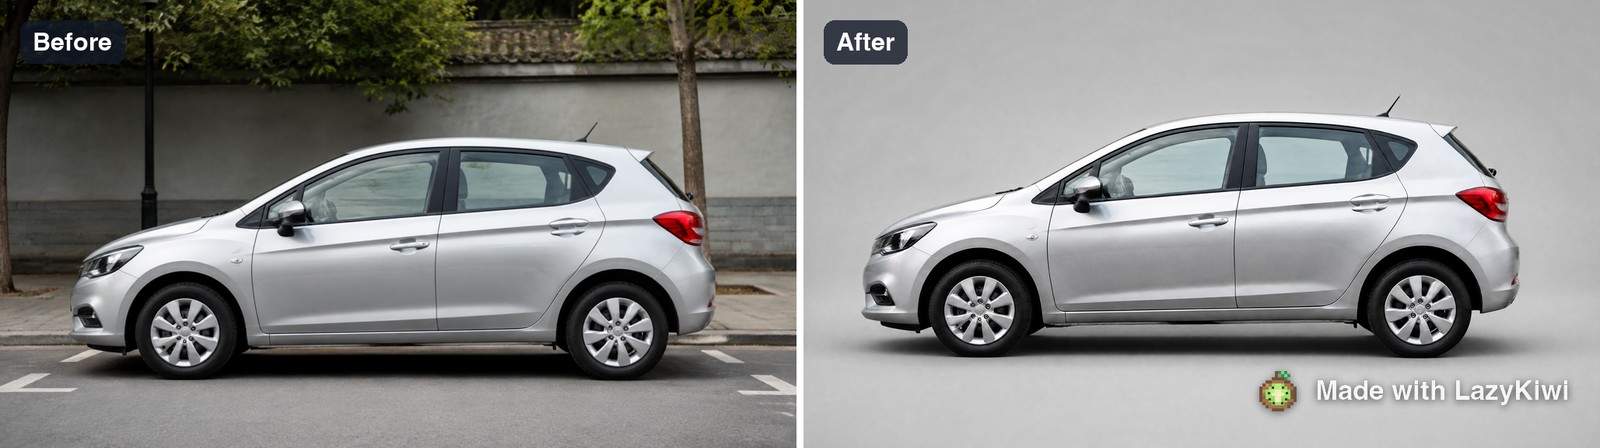
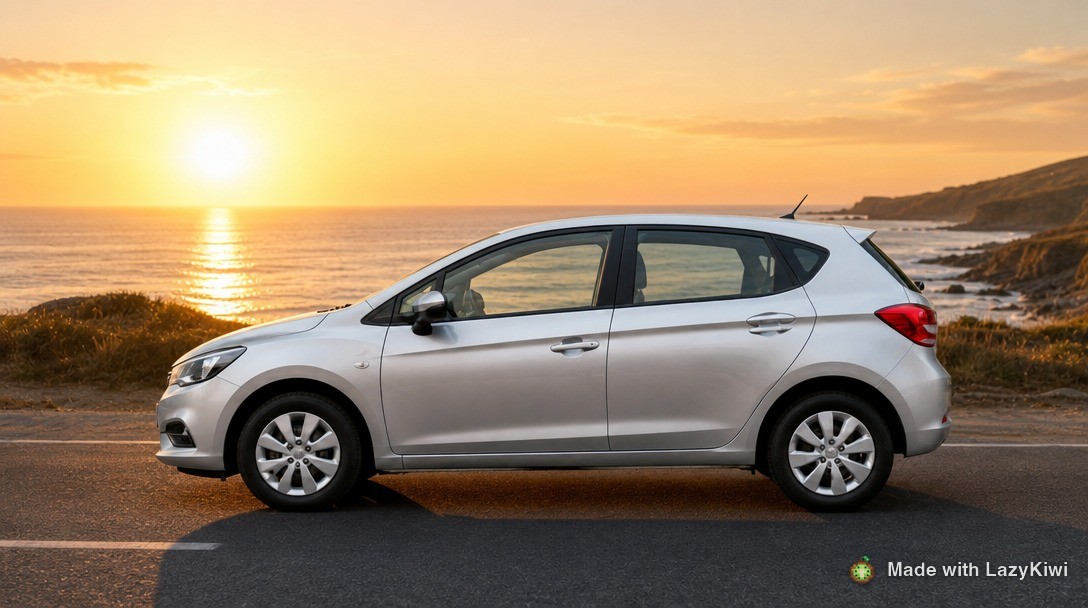
Both ran on GPT Image 2, and the rest of the image workbench holds the tidying tools, including object removal for the bollard nobody noticed. Check every result against the original at full size: a generated background can quietly alter a wheel or a mirror, and on a sale listing that is not a cosmetic problem. Dedicated cut-out services such as remove.bg and PhotoRoom, whose background remover it says is used by more than 80 million people, are the alternative when you want the car isolated and nothing else changed.
What do second-hand listing photos need that enthusiast photos do not?
They are two different jobs. One sells a feeling, the other answers questions before a buyer has to ask them.
- Damage, photographed deliberately. Every scratch, kerbed wheel and stone chip gets its own frame. It shortens the viewing and it protects you afterwards.
- The odometer, sharp and readable, with the ignition on.
- The VIN plate or registration document, framed so it is legible. Cover what you do not want public, and say that you have.
- Service history, tyres and boot space. Unglamorous and the most viewed frames in any listing.
- The same framing on every frame. A set shot from one height at one distance reads as an honest seller far more than a single dramatic photograph does.
Enthusiast work inverts this: fewer frames, more atmosphere, and the freedom to shoot at an angle that hides the number plate. Community galleries such as 500px are full of that version, and almost none of it would work as a listing.
What are the most common car photography mistakes?
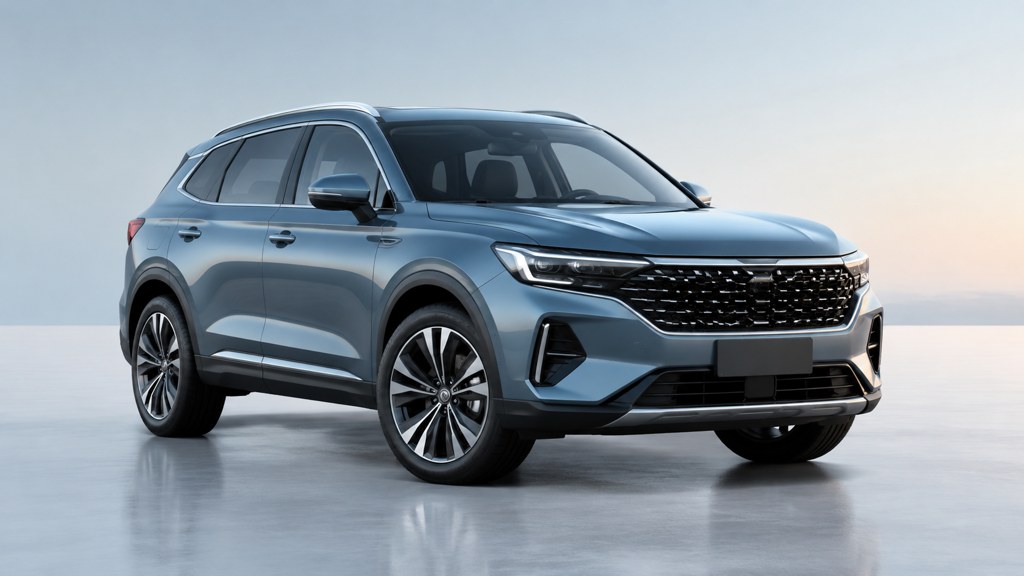
- Wheels turned the wrong way, so the front wheel shows as a thin edge instead of a face.
- The photographer reflected in the door. Check the flank at full size before you leave.
- A cluttered background: bins, bollards, other cars, a For Sale sign in a window.
- Midday sun on dark paint, which produces a white streak that no editing recovers.
- Shooting from standing height, which shortens the car and flattens the shoulder line.
- Skipping the boring frames. The tyres, boot and service book are the ones buyers open first.
- Editing damage out. It is the one mistake on this list that has consequences beyond a poor photograph.
Most of the how to take car photography advice online starts with gear. It should start with where you park: an empty sky, a clean horizon and a wall behind you that is not going to appear in the paint.
Key takeaways
- A car is a curved mirror, so choose the location by what is above and beside it, not by the backdrop.
- Overcast light and the hour after sunset beat midday, because a large soft source reflects as a gradient rather than a hot spot.
- Five frames minimum for a listing: two three-quarters, a profile, an interior and the odometer.
- On a phone, get to wheel-arch height, step back and use the 2x or 3x lens instead of the wide one.
- Change the setting and the light in editing; never change the condition of the vehicle.
- The background changer keeps the car and swaps the scene for 13 credits per 1K image; check the result against the original at full size.
Commercial Imagery Editor
Elena Vasquez
I came from product and property photography, so I care about the boring parts: scale, shadows, disclosure rules, and what a listing platform will reject.
FAQ
Common questions
What is car photography?
Photographing vehicles for sale, for a brand or for enthusiasts. It sits closer to studio product work than to scenery work, because a painted panel behaves as a curved mirror, so most of the craft is deciding what gets reflected in it rather than exposing the scene.
What camera for car photography?
Almost any modern camera or recent phone will do. Position and light matter far more than the body. If you are choosing a lens, something in the standard range keeps proportions honest; very wide lenses close up stretch the nose and shorten the flank of the car.
What is car photography called?
Automotive photography is the usual professional term, with vehicle photography used by marketplaces and dealers. Within it, rolling shots mean the car photographed in motion from another vehicle, and static or studio work covers everything shot with the car standing still.
Is it legal to edit the background of a car listing photo?
Replacing a setting while leaving the vehicle untouched is generally acceptable, but the marketplace decides, so read its seller rules before you list. Removing damage, a warning light or altering the odometer is misrepresentation regardless of which platform you are on.
How do you photograph a black car?
Find the largest, softest light you can: heavy overcast, open shade or the twenty minutes after sunset. Dark paint shows every hard reflection, so an empty sky and a clean horizon matter more here than on any other colour. Avoid direct sun entirely.
Swap the car park for a clean backdrop
The car window glow template makes a styled night scene rather than a listing photo, so treat it as a social frame. Each 1K run costs 13 credits, 40 free at signup.
Related reading
Pose Reference Library: 40 Poses by Use Case
Forty pose references sorted by what you need them for, figure drawing, portrait sessions, product shots, plus how to generate your own on demand.
10 min read
AI Photo Booth: Event Options and Cheaper Setups
What an AI photo booth costs to rent, what the software actually does, and how to run one for a wedding or office party without hiring a vendor.
9 min read
How to Pose for Pictures: 12 Rules That Work
Twelve posing rules that hold for any body and any camera: weight, angles, hands, chin and breath. Plus what to do in the three seconds before the shutter.
10 min read
AI Product Photography: White Background to Branded Scene
AI product photography in practice: shoot on a phone, get a white-background image, swap in a branded scene, upscale, and export to Amazon and Google rules.
8 min read