
Digital Camera Filter: Get the 2000s Flash Look
A digital camera filter is four things at once: direct flash, small-sensor noise, clipped highlights and a cool cast. How to shoot it and how to fake it.
 Maya Chen 9 min read
A digital camera filter is not a preset, it is four physical causes reproduced together: a flash sitting next to the lens, a small sensor making coloured noise, a narrow dynamic range that clips highlights to white, and an auto white balance that leans blue. Reproduce all four and the picture reads as a compact camera from the middle 2000s. Reproduce one and you have a modern phone photo with a colour cast. Below: the shooting settings that get it in camera, the five-step edit order that fakes it convincingly, how digicam differs from Y2K and disposable-camera looks, and a workbench template run with the limit it hit.
What actually makes a photo look like an early digital camera?
Four physical causes, and every convincing version of this look reproduces all four. Miss one and the picture reads as a modern phone photo with a colour cast on top.
- 1
Direct on-camera flash
A tiny light source sitting almost exactly where the lens is. It flattens the face, blows out whatever is nearest, and drops the background into darkness within a metre or two. That hard falloff is the signature.
- 2
Small-sensor noise
A compact sensor collecting little light produces coloured speckle in the shadows, not the fine even grain of film. It sits in the image rather than on it, and it is strongest where the flash did not reach.
- 3
Limited dynamic range
Highlights clip to pure white with no roll-off, and shadows block up to near black. There is very little detail at either end, which is the opposite of what a phone's computational pipeline is built to give you.
- 4
A slightly cool white balance
Auto white balance on those cameras leaned blue under mixed indoor light, so skin sits cooler than it should and whites go faintly cyan.
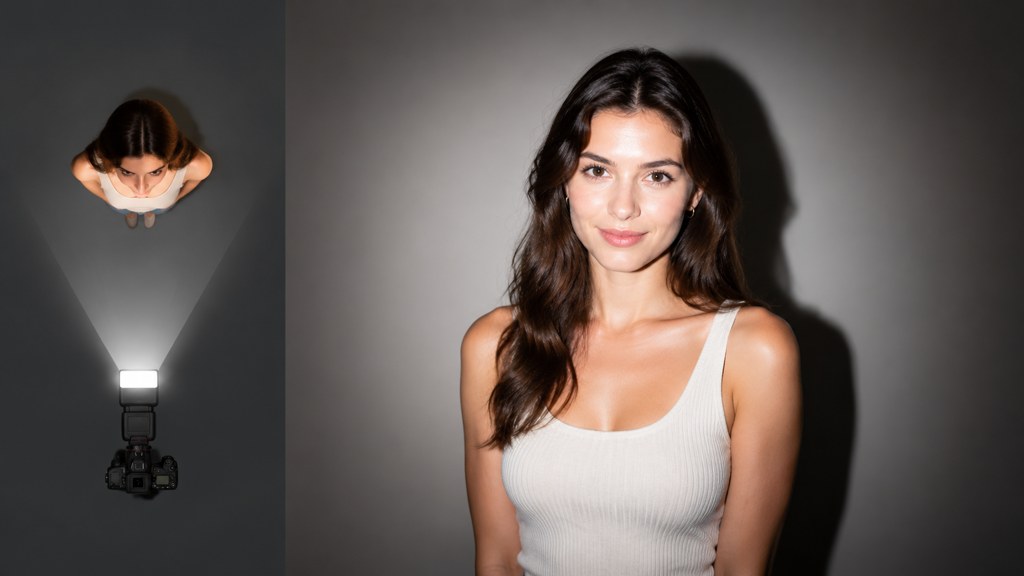
Everything beyond those four is decoration. Date stamps, vignettes and light leaks belong to other formats and mostly give the game away.
How do you get the digicam look with a phone?
You can shoot this rather than fake it, and shooting it is more convincing because the falloff is real. The settings list is the whole value of this section.
- Flash on, always. Not auto, not torch. You want one hard burst from the lens position.
- Get closer than feels polite: about a metre from the subject. Distance is what creates the bright subject and dark background separation.
- Turn portrait mode off. A blurred background is the single biggest tell, because a small sensor at that distance keeps almost everything sharp.
- Turn off night mode and any auto scene enhancement, so the phone stops rescuing the shadows.
- Tap to expose on the brightest part of the face and accept the dark background rather than lifting it.
- Shoot indoors after dark or in a dim room. Daylight overpowers the flash and the effect disappears.
- Frame loosely and slightly badly. Perfect thirds composition is a modern habit; these photos were taken quickly at arm's length.
The one-metre test
If the wall behind your subject is still clearly lit, you are too far away or the room is too bright. Step in until the background goes dim and the subject stays bright. That gap is the effect.
How do you fake a flash filter on a photo you already took?
Editing a normal photo into this look is an ordering problem. Do these five in sequence, because each step changes what the next one has to work with.
- 1
Cool the white balance first
Shift towards blue before anything else. Doing it after you add contrast bakes a colour cast into already-clipped highlights, and you cannot pull it back out.
- 2
Raise contrast and let the highlights clip
Deliberately push the brightest areas to pure white. Modern editing habits protect highlights; this look depends on losing them.
- 3
Crush the shadows
Lift the black point until shadow detail disappears rather than turning grey. Grey shadows read as an underexposed modern photo.
- 4
Darken the background separately
If the original was evenly lit, mask the background down. This is the step people skip, and it is the one that fakes the flash falloff.
- 5
Add noise last
Coloured noise, concentrated in the shadows, added after everything else. Adding grain early means every later adjustment smears it, which is exactly why so many attempts look like a texture layer sitting on top of a clean photo.
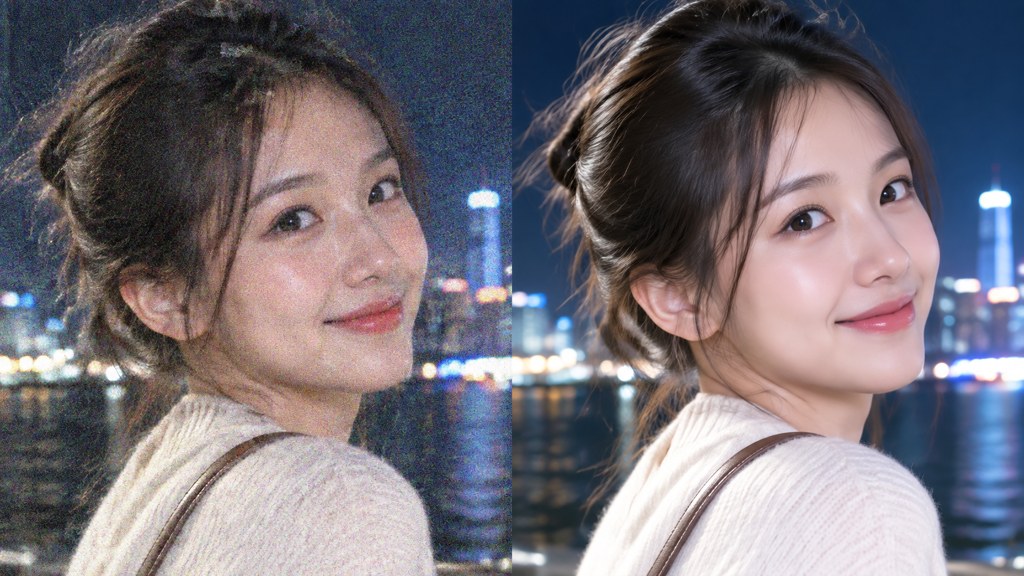
The AI photo editor will do the whole sequence from one instruction if you name the steps in that order in the Prompt box. What it will not do is invent shadow detail you clipped away, so keep the original file.
What is the difference between digicam, Y2K and disposable camera looks?
Three aesthetics get used interchangeably and they have different causes, which is why mixing their ingredients produces something that looks like none of them.
| Look | Cause | Colour | Grain | Give-away |
|---|---|---|---|---|
| Digicam | Small CCD sensor plus on-camera flash | Cool, slightly cyan whites | Coloured speckle in shadows | Hard falloff behind the subject |
| Y2K filter | Design era rather than a camera | Saturated, often magenta or teal | Optional | Graphics and typography, not optics |
| Disposable camera | Colour negative film plus a plastic lens | Warm, greenish shadows | Even monochrome film grain | Soft corners and a wide flat frame |
Practical consequences: a Y2K filter is a styling choice you can apply to any photo, a disposable camera filter should be warm rather than cool, and a digicam aesthetic needs the flash geometry or it needs nothing. The wikipedia entries on the digital camera and the Y2K aesthetic are a reasonable sanity check on which era you are actually reaching for.
For the film side of that table, the compact-camera and colour-negative history on Kodak's own company history page is a useful reminder that disposable cameras were a film product with a plastic lens, and that nothing about them was cool-toned.
Which templates produce the flash look from a normal photo?
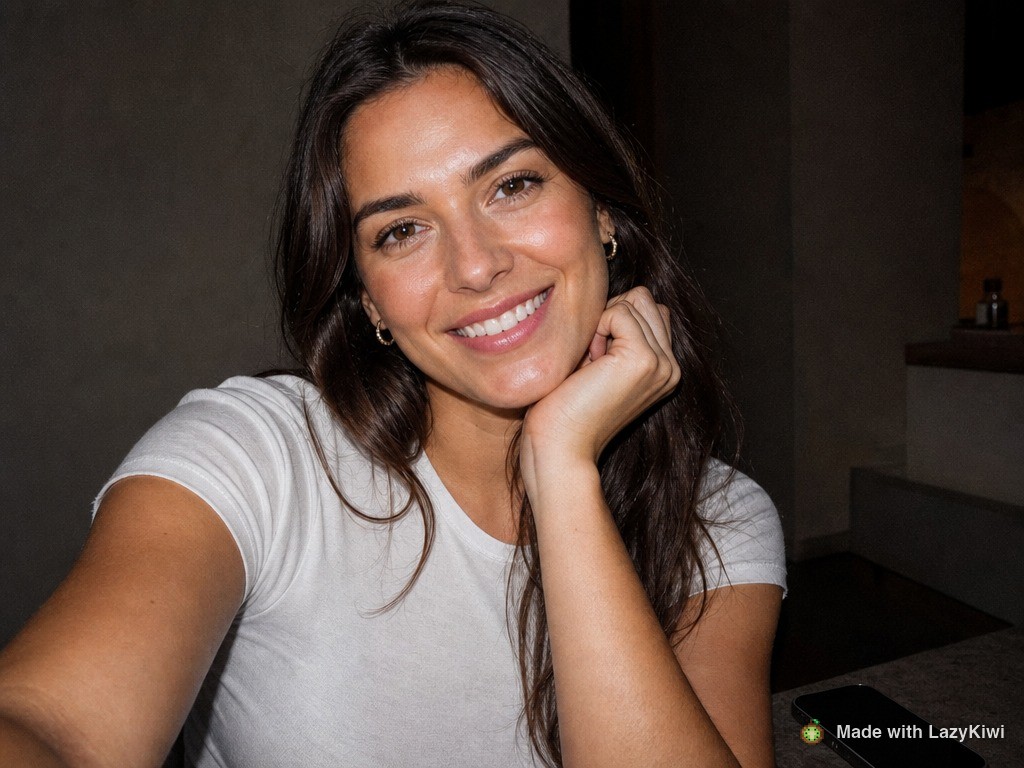
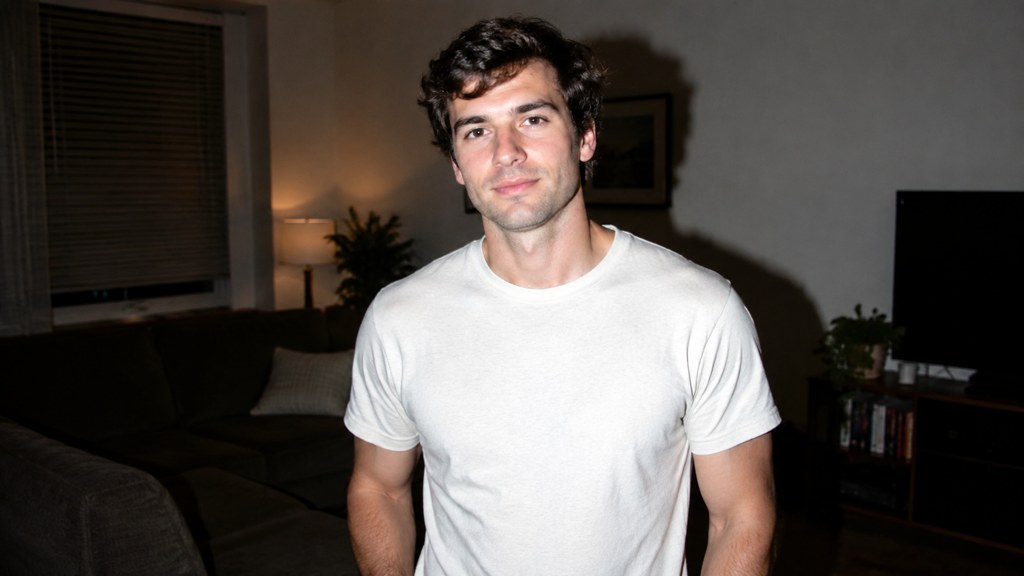
Four flash templates ship in the workbench and they differ in what they do to the background, not in the flash itself. I ran the first of them twice to see what one template does with two very different inputs.
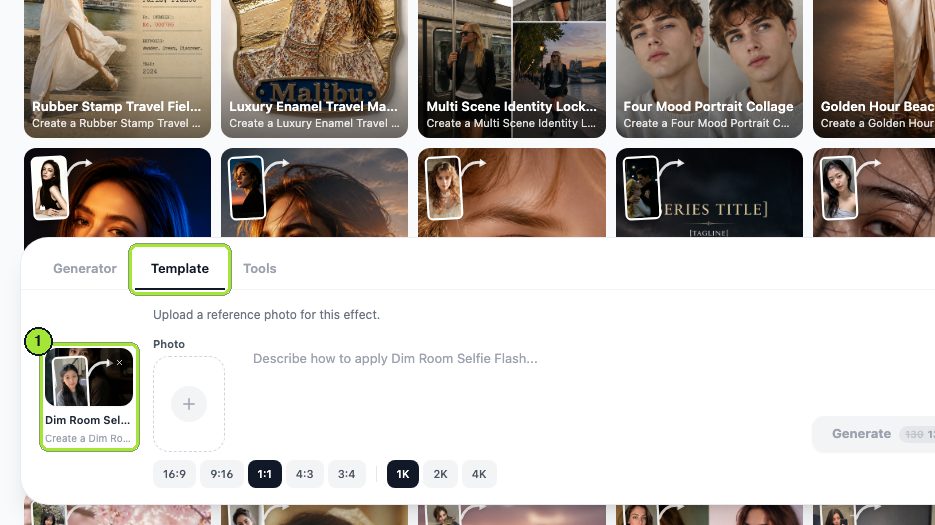
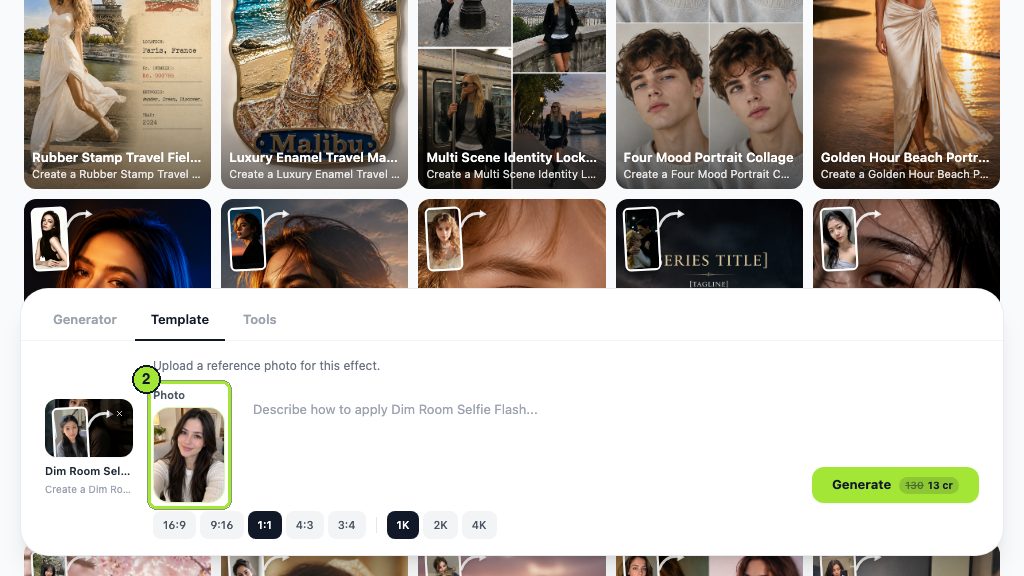
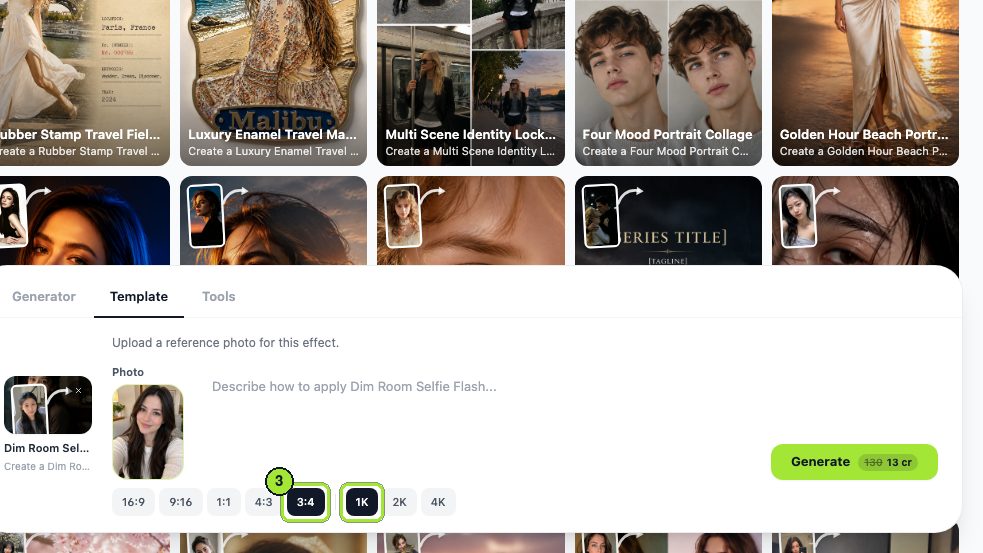
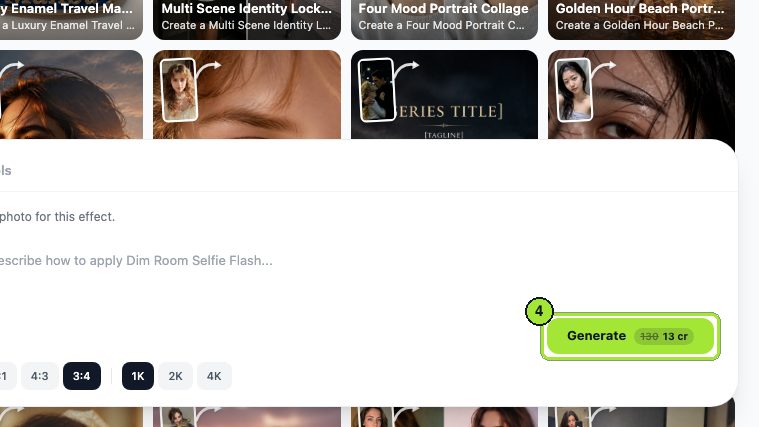
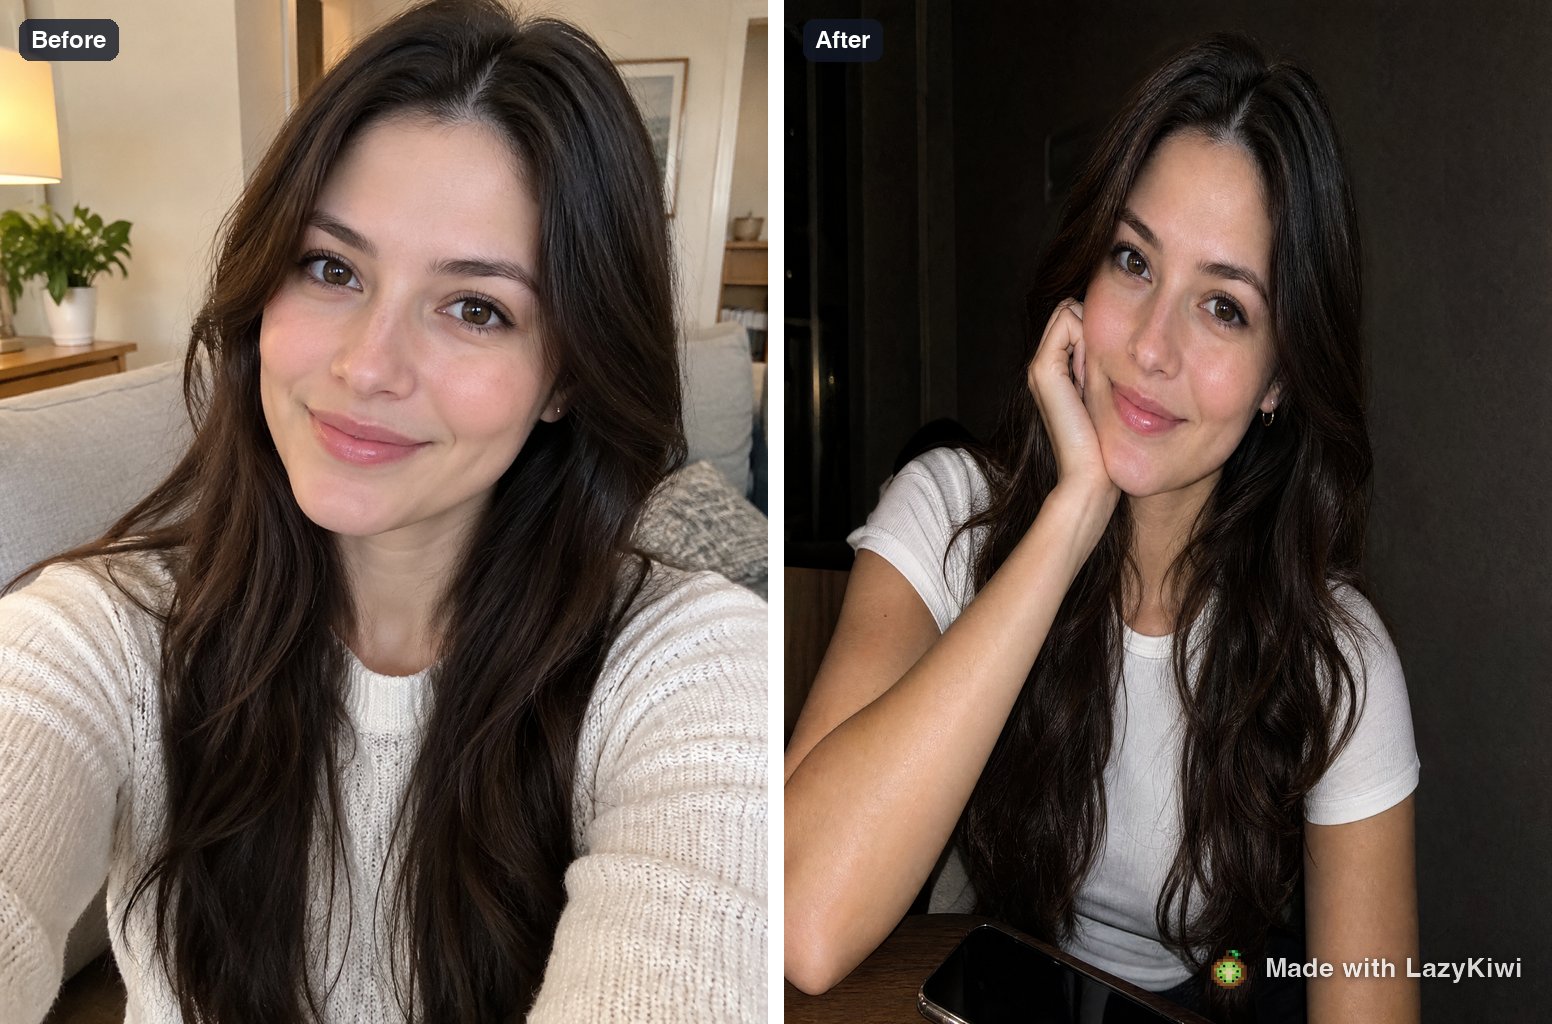
The second run is where the limit shows. Fed a photograph of two people in a park, the same template returned a single styled person. Dim Room Selfie Flash is built for one face, so a couple or a group needs a different approach entirely. That is a template limit worth knowing before you plan a set of party photos around it.
| Template | Does to skin | Does to background | Use it for |
|---|---|---|---|
| Dim room selfie flash | Bright, flat, slight shine | Drops it to near black | Single-face indoor selfies |
| White shirt flash portrait | Clean and high key | Keeps a plain wall readable | A tidy portrait version of the look |
| Wet flash close-up | Adds sheen and specular highlights | Very close crop, little background | Beauty-style close crops |
| Dark room flash editorial | Contrastier, more shadow on the face | Deep black, editorial framing | Moodier full-length shots |
If you want the flat, high-key version instead of the near-black one, the white shirt flash template is the one to open. Both runs above went through GPT Image 2 at 1K. In LazyKiwi's workbench data (August 2026), square 1:1 is the dominant image ratio at 124 of 143 external image jobs, which is worth knowing here because 3:4 and 4:3 suit this look better than a square crop does.
How do you shoot a whole night out in this style?
A run sheet, because consistency across a set is what makes people ask which camera you used.
- Decide the distance once, at the start of the night, and keep it. Changing distance changes the falloff and breaks the set.
- Shoot every photo with the flash, including the ones in lit rooms. Half-flash sets look like an accident.
- Take the photo two seconds earlier than you would normally. The reaction to the flash is the shot.
- Shots that work: two people close together, a table from above, someone against a plain wall, a hand holding something.
- Shots that always fail: anything more than two metres away, a wide room, a stage, anything backlit.
- Do not review between shots. The night is the subject, and the batch is the deliverable.
Then edit the whole set with one recipe rather than photo by photo. One white balance shift, one contrast curve, one noise amount. Individually tuned photos never look like they came from the same camera, which is precisely what you are claiming.
Is there a free digital camera filter app?
Free tiers, read on each vendor's own page on 7 September 2026. Prices move, so the date matters more than the number.
- Fotor: the Basic plan is described as free forever, with limited free credits, one generation at a time, 512MB of storage and a 30-day retention window on your creations. Exports on that plan are watermarked JPG, PNG and PDF.
- Picsart: the pricing page today lists Pro at $10.5 a month billed yearly, marked down from $15, with 50 daily generations across its AI tools and 100GB of storage, and Ultra at $37.5 billed yearly from $47. The page describes a free trial rather than a documented permanent free tier.
- Pixlr: Plus at $2.49 monthly or $1.99 on yearly billing gives 80 monthly AI credits and removes ads, Premium is $9.99 or $7.99 with 1,000 credits, and Ultra is $24.99 or $19.99. Free-tier terms are not stated on that page.
- BeFunky: three tiers named Free, Plus and Pro. The pricing page lists what each tier includes but shows no prices and no watermark policy, so treat both as things to check at sign-up.
- CapCut: free editors across desktop, online, pad and mobile, which is where most people apply this look to video rather than stills.
None of those is a dedicated digital camera filter. They are general editors where you build the look from the five-step recipe above, which is why a template that ships the look already assembled saves more time than a cheaper subscription does.
What makes a fake digicam photo obvious?
Four tells, in the order people notice them.
- Perfect skin under a hard flash. Direct flash is unflattering; it shows texture, shine and every blemish. Smoothed skin plus hard light is a combination that never existed.
- A soft, blurred background. A small sensor at a metre keeps the room sharp. Blur says phone portrait mode, and it says it instantly.
- Grain sitting on top of the image. Real sensor noise is coloured, uneven, and concentrated where the light did not reach. A uniform grey grain layer across the whole frame is a filter, and it looks like one.
- Clean modern shadows. If you can see detail in the dark parts of the frame, the dynamic range is wrong for the era you are imitating.
The other giveaway is the set rather than the photo. Twenty photos in this style, each edited slightly differently, is a giveaway that no single image would be. Batch them.
Key takeaways
- A digital camera filter is four causes at once, not a preset: on-lens flash, small-sensor noise, clipped highlights, cool white balance.
- Shooting it beats faking it. Flash on, one metre away, portrait mode off, dim room.
- Edit order matters: white balance, contrast, shadows, background darkening, then noise last.
- Digicam is cool and hard-lit; a disposable camera filter is warm and film-grained. They are not interchangeable.
- The flash template tested here is built for one face; it returned a single person from a two-person photo.
- Batch-edit a whole set with one recipe. Individually tuned photos never look like one camera.
Image & Design Editor
Maya Chen
Maya writes about image tools from the desk rather than the demo reel. She tests templates on ordinary photographs, keeps the runs that fail, and reports what the panel actually shows.
FAQ
Common questions
What is a digicam filter?
A digicam filter imitates a mid-2000s compact camera: hard on-lens flash, coloured noise in the shadows, highlights clipped to pure white and a slightly blue white balance. The flash geometry is the part that matters; the colour shift alone will not carry it.
How do you get a y2k filter look without the camera?
Treat it as a design choice rather than an optical one. A y2k filter leans on saturated magenta and teal, graphic overlays and typography, so it can sit on any sharp modern photo. The digicam look cannot, because it depends on how the light fell.
Is a disposable camera filter the same thing?
No. A disposable camera filter should be warm, with greenish shadows and even film grain from colour negative stock behind a plastic lens. Applying cool cyan whites to it produces something that matches neither format, which is the most common mistake.
Why does my ai flash filter result look fake?
Usually because the skin is too clean and the background is too soft. Hard direct light shows texture and shine, and a small sensor at close range keeps the room sharp. Smoothed skin plus a blurred background is the combination that gives it away.
What phone settings get closest to a 2000s filter?
Flash forced on, portrait mode and night mode off, about a metre from the subject, exposure tapped on the brightest part of the face, shot in a dim room after dark. That gets you closer than any digital camera filter will, because the falloff is real rather than painted on.
Put the flash look on a photo you already have
One photo in, the dim-room flash version out. Pick a ratio, pick a resolution, and the button shows the price before you spend anything.
Related reading
Paper Animation Tools: Free Options Compared
Tools that turn a photo or idea into a paper-craft animation, compared on style range, render length and what each free tier actually lets you export.
8 min read
How to Make Paper Animation: 3 Working Methods
Build a paper animation by hand, in After Effects, or from a photo with AI. Each method's real time cost, kit list and the look it produces.
8 min read
Polaroid Filter: How to Get a Real Instant Look
Instant film has specific faults — soft corners, warm cast, crushed shadows, a white border. Recreate them deliberately instead of stacking a preset.
8 min read