
How to Restore Old Photos: Full 2026 Workflow
Scan, repair, colorize and enlarge a damaged print in one pass. The order that matters, what each step can and cannot fix, and where free tiers stop.
 Maya Chen 9 min read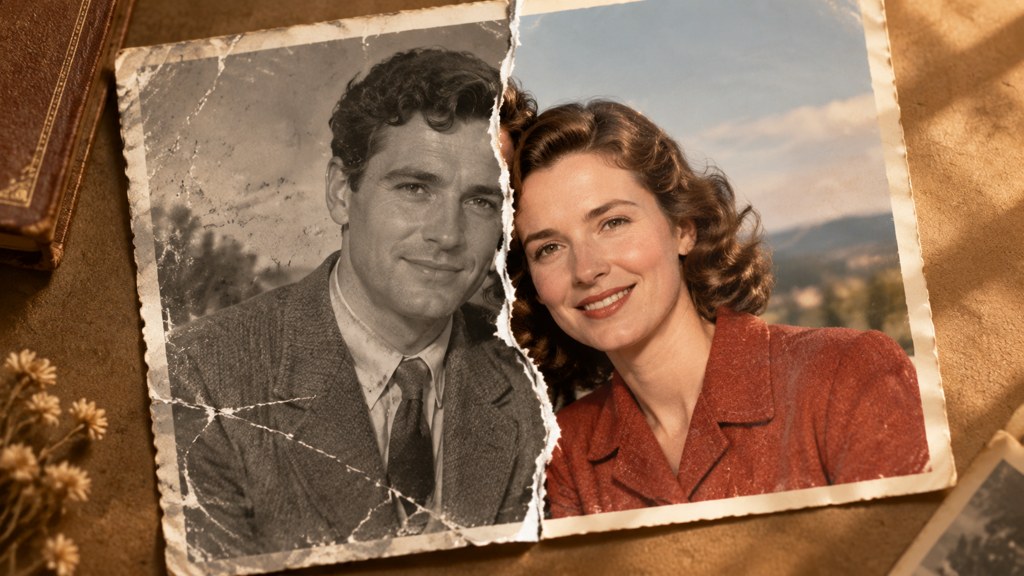
Asked plainly, how to restore old photos comes down to a fixed order of operations: scan the print properly, straighten and crop, repair the physical damage, clean the noise, add colour only if you want it, and enlarge last. Run those steps out of sequence and you get the waxy, mannequin-faced output that makes people distrust AI restoration on sight. What follows is that chain run end to end on one genuinely damaged print, with the exact settings and the credit cost of each pass, plus a straight account of the parts no software can do for you.
What damage can you actually fix when you restore old photos?
Before you work out how to restore old photos, sort the damage. Four kinds of decay respond well to repair. One kind never does, and knowing which is which saves you from burning credits on a print that will not improve.
- **Fading and colour shift.** The dye layers in a colour print decay at different speeds, which is why 1970s snapshots drift magenta while older prints go amber. The image data survives; it is skewed rather than gone, so a correction pass recovers most of it.
- **Creases, tears and missing corners.** Real physical loss. Nothing under the tear was recorded, so the model writes a plausible continuation of cheek, collar or sky. A tear across a jacket reconstructs convincingly. A tear through an iris does not.
- **Silvering, mould bloom and foxing.** Surface chemistry sitting on top of the picture. The Image Permanence Institute (2026) and the National Park Service museum program (2026) both treat these as storage failures, which means the print will keep deteriorating unless you change how it is stored.
- **Low scan resolution.** Fixable up to a point. Enlargement invents edges rather than uncovering them, so the gain is real but bounded.
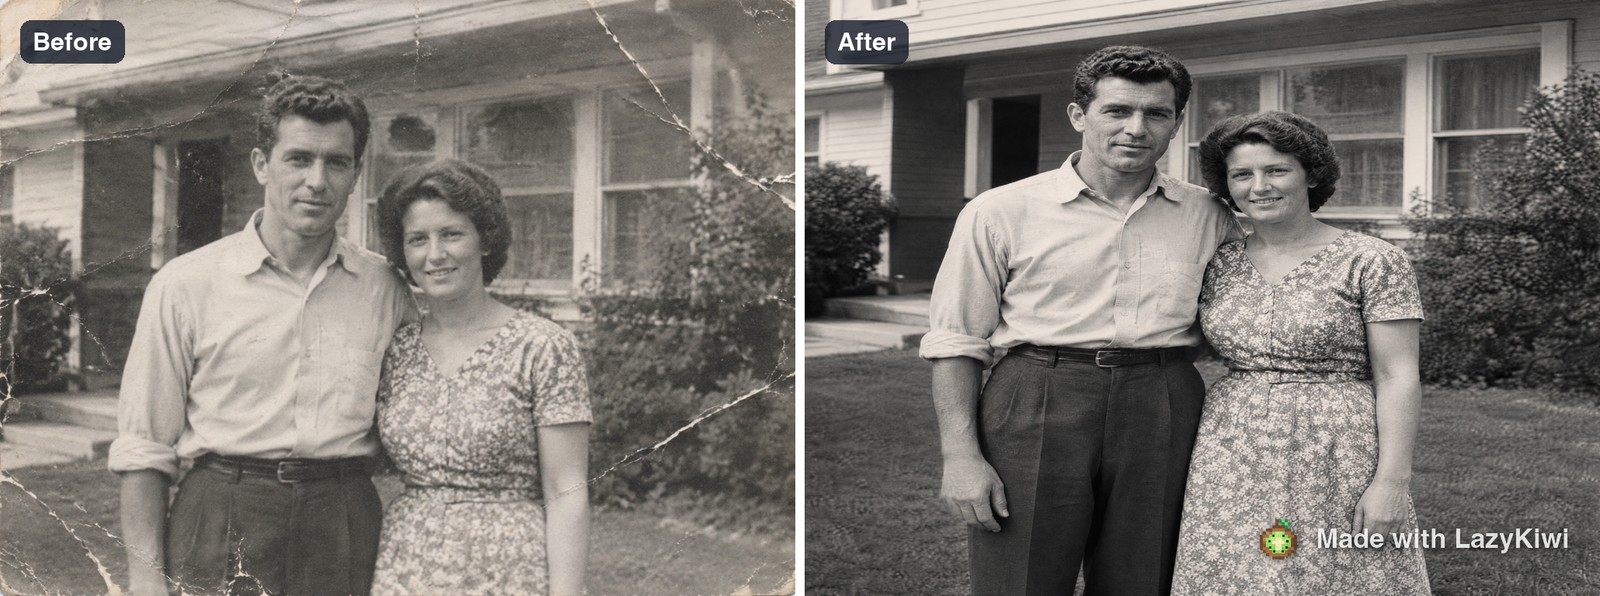
The fifth category is the one people argue with. Detail that was never captured cannot come back. A box camera stopped down in a dim front room recorded a fixed amount of edge information, and no amount of processing adds more. What restoration software does instead is generate something believable in that gap, which is fine for a mantelpiece print and a problem for anything used as evidence.
How to judge a result
Zoom to 100 percent and look at three places: the eyes, the hairline, and any printed text in the frame. Those are where invented detail shows first. A thumbnail flatters every restoration.
How should you scan or photograph a print before restoring it?
Everything downstream inherits the scan. A soft, skewed capture at 200 dpi caps the quality of the repair, the colour work and the enlargement all at once, and no later step recovers what the scanner missed.
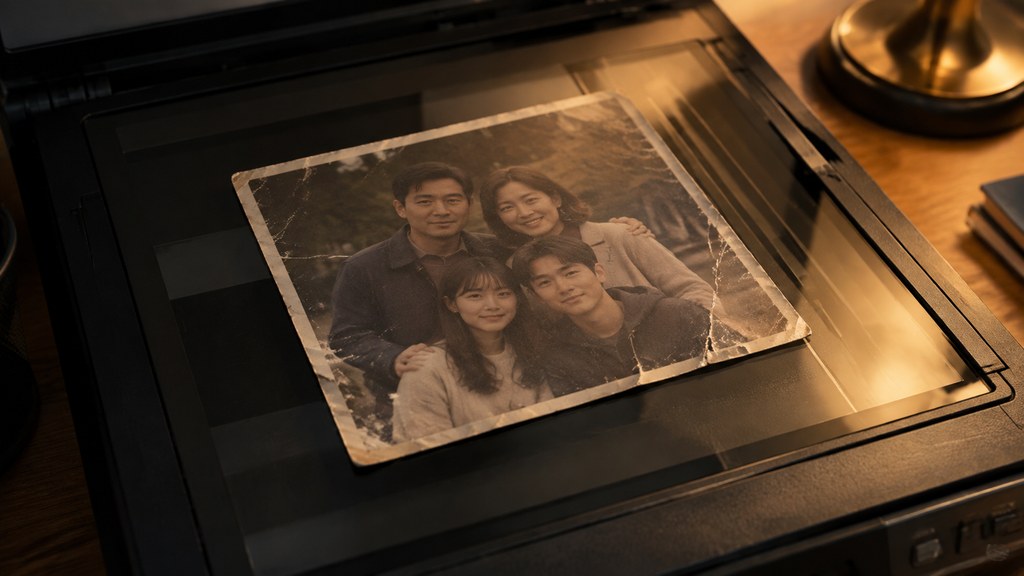
Choose the resolution from the pixel dimensions you want, not from habit. A 6-inch long edge at 600 dpi lands at 3,600 pixels, which is comfortable for a repair pass and a reprint at the original size. A wallet print with a 3-inch edge needs 1,200 dpi to reach the same 3,600 pixels. Anything smaller than a postage stamp, such as a contact sheet frame, goes higher still.
- 1
Clean the platen, not the print
Dust on the glass duplicates itself across every scan you make that session. Loose surface dust on the photo can be lifted with a soft brush, but leave anything stuck to the emulsion alone; the guidance from the US National Archives (2026) and the Getty Conservation Institute (2026) is that damage from cleaning is permanent while a stain is not.
- 2
Scan flat and square
Close the lid gently on a curled print rather than pressing it. If the print will not lie flat, weight the corners with clean paper rather than fighting it under the lid.
- 3
Save a TIFF master
JPEG compression bakes blocky artefacts into exactly the smooth tonal areas that restoration models struggle with. Keep a TIFF, then export whatever you like from it.
- 4
If you only have a phone, control the light
Daylight from a window at roughly 45 degrees, flash off, phone parallel to the print, and a second shot rotated 180 degrees so you can pick whichever has less glare. Shoot the largest format the camera offers rather than a screenshot of the gallery view.
That last route matters more than it sounds. A phone scan is where most people begin, and a mediocre phone capture is still better than a good scan you never make because the flatbed is in a cupboard.
How to restore old photos step by step
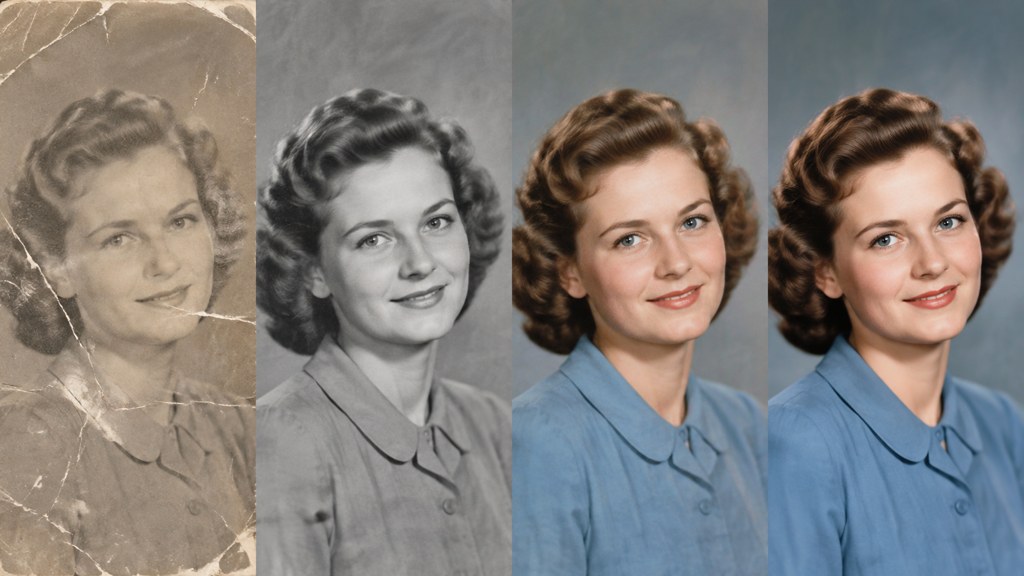
The order below is not arbitrary. Each step either adds information or removes it, and running them backwards means a later step amplifies an earlier mistake. Colour applied to an unrepaired crease paints the crease. Enlargement applied to noise enlarges the noise.
- 1
Scan
One high-resolution capture, saved untouched, never overwritten.
- 2
Straighten and crop
Fix rotation now so the repair model is not asked to rebuild a wedge of empty corner.
- 3
Repair structure
Tears, creases, holes, missing corners. Everything physical.
- 4
Clean noise and stains
Grain, silvering haze, foxing spots. After structure, because a repair pass adds its own texture.
- 5
Add colour, if you want it
Optional and reversible only if you kept the master. Colour is interpretation, not recovery.
- 6
Enlarge
Last, always. Enlargement scales up every mark the file already carries, mistakes included.
Here is that chain running in the photo restoration tool on the creased 1950s print. The workbench composer is deliberately small: a tool chip, an upload box, a Prompt box, aspect-ratio chips, resolution chips and Generate. There is no strength slider and no brush, so anything that looks like a setting elsewhere is expressed here as words in the Prompt box.
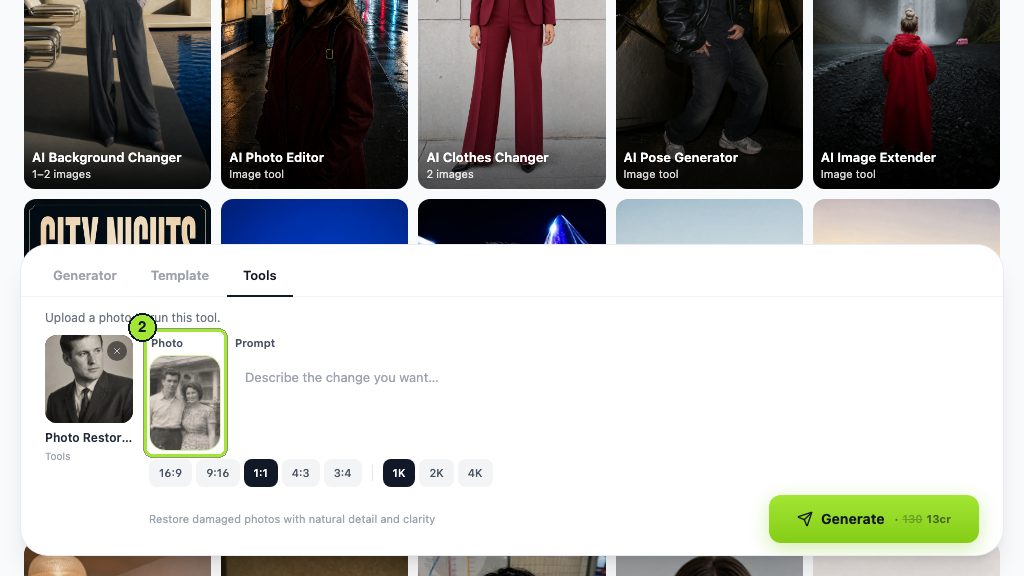

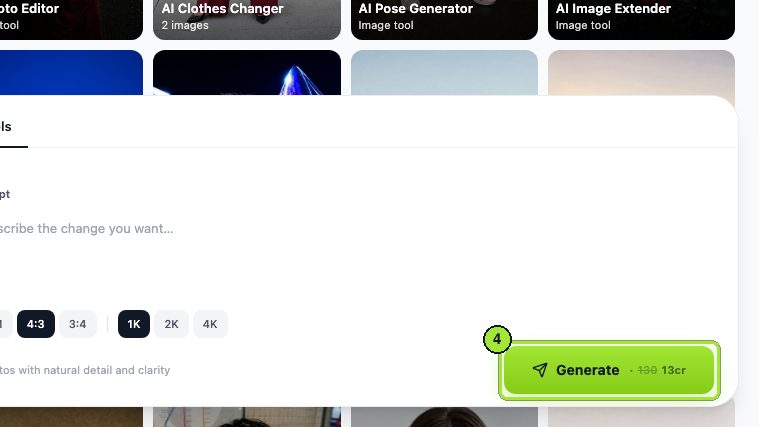
Both runs used GPT Image 2, the same model behind the rest of the image side of the workbench. Pricing is per image rather than per minute: 13 credits at 1K, 17 credits at 2K. A new account starts with 40 free credits, so three passes at 1K fit inside the grant with change left over.
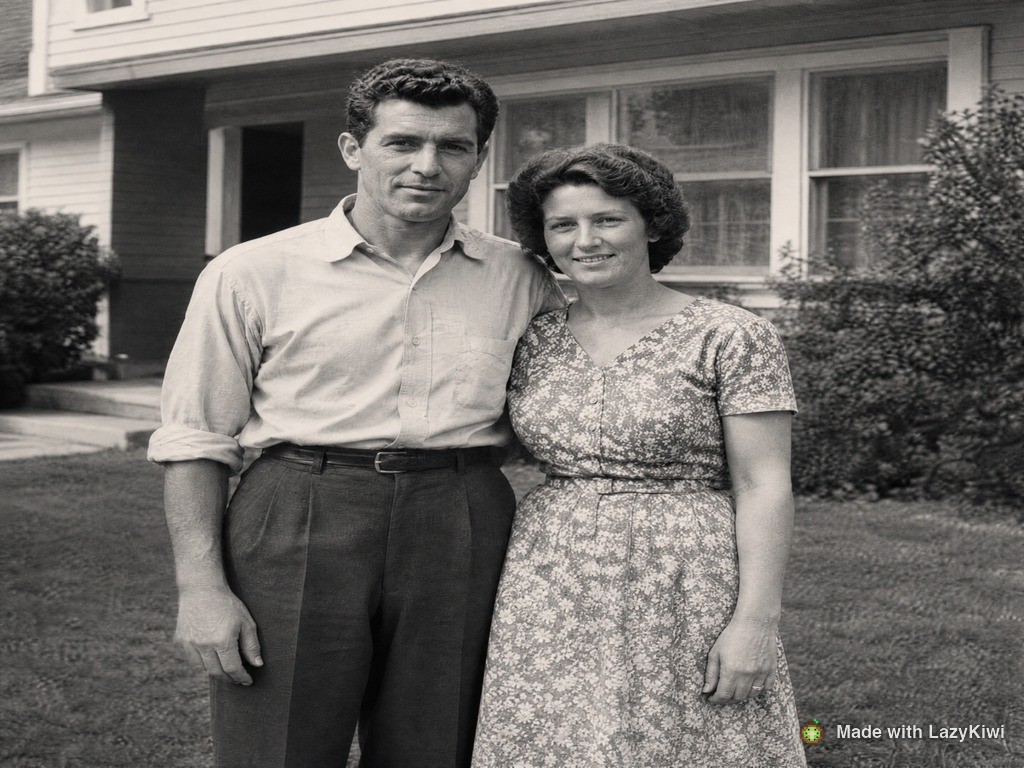
One pass rarely finishes the job, and that is normal rather than a failure. The first run handles the broad tonal recovery. What it leaves behind is the argument for a second, narrower instruction.
How do you repair tears, creases and missing corners?
Structural repair is inpainting (2026): the model reads the surviving pixels around a gap and writes new ones that continue the pattern. Photoshop's content-aware fill is the same idea with a sampling region you draw by hand, which stays a useful mental model even when the interface hides the brush.
The practical consequence: the fix is only as good as the surrounding evidence. A crease running through a plain wall is trivial because the wall repeats. A crease running through a patterned dress is harder because the pattern has to line up on both sides. A crease running through a face is the case where you should consider stopping, since a reconstructed jawline is a guess about a specific person.
The workbench has no mask brush, so the second pass is a second run with the damage named in words. Nothing else changed between the two runs: same photo, same 4:3 ratio, same 1K resolution.
Second pass: repair the tear at the top-right corner and the crease across the middle, keep the image black and white and keep both faces unchanged.
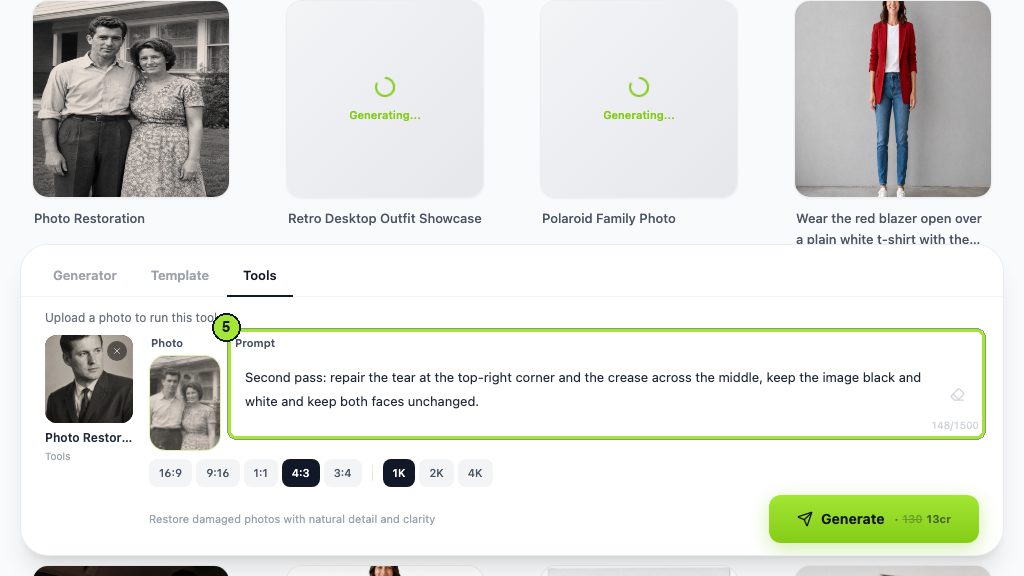
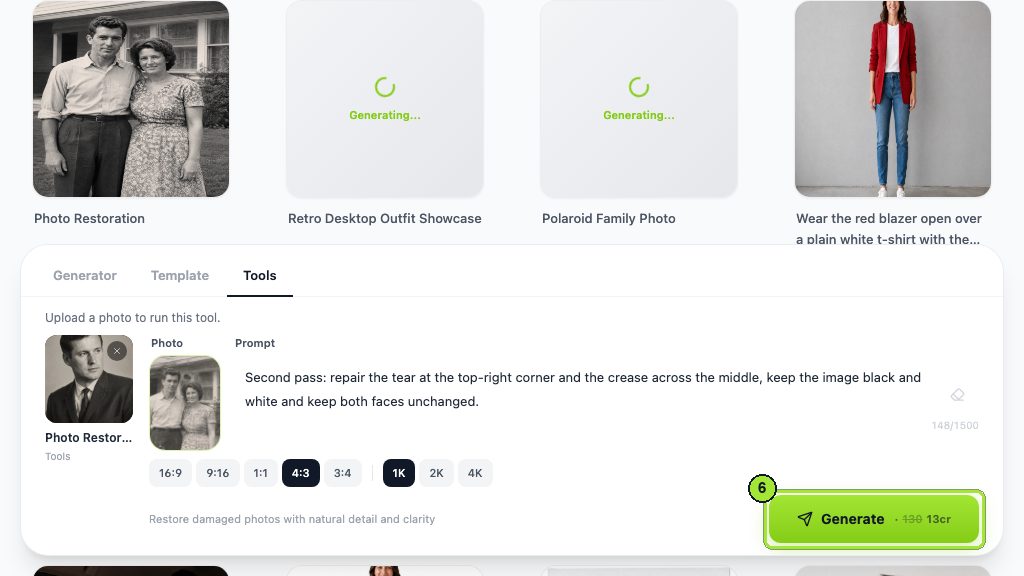
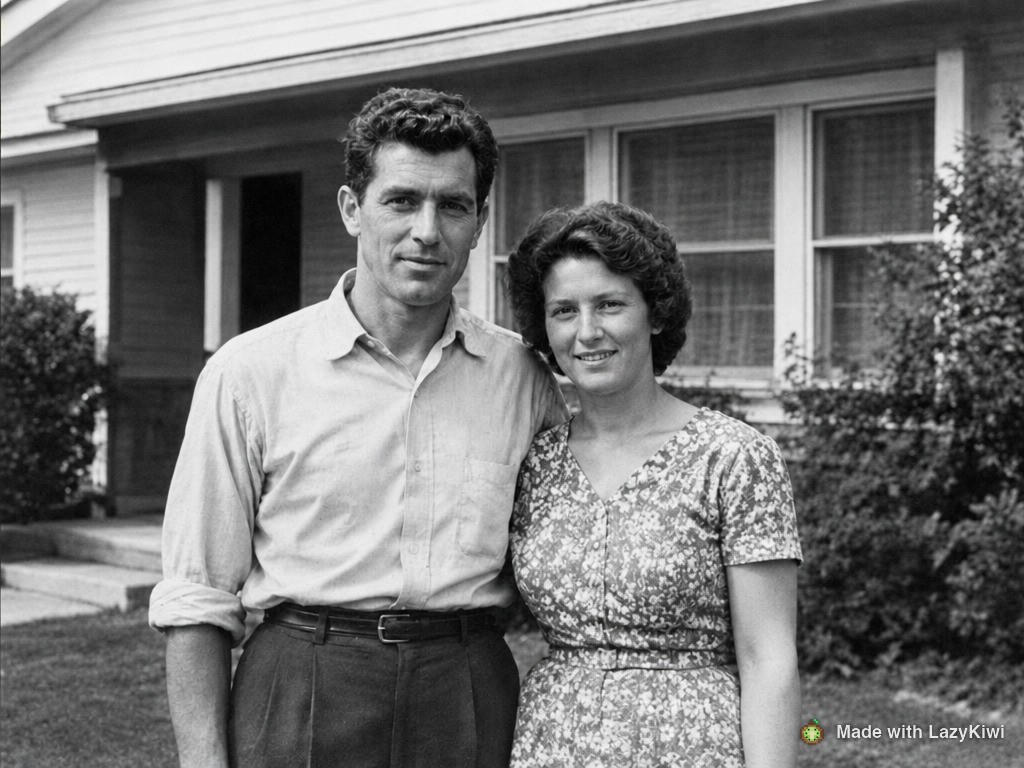
Two instructions in that prompt do most of the work. Naming the damage by location stops the model wandering across the whole frame, and telling it to keep both faces unchanged is what protects the part you actually care about. Left unsaid, a restoration pass will happily restyle a face it considers imperfect.
How do you fix old photos that are faded or yellowed?
Yellowing is not a white-balance problem, which is why dragging a temperature slider never quite fixes it. In a colour print the three dye layers fade at different rates, so the cast is uneven across the tonal range: highlights may be close to neutral while shadows have gone brown. Correcting it as a single global shift trades one cast for another.
Work in two passes instead. Pass one neutralises: ask for the cast to be removed and the original tonal range restored, and say nothing about colour choices. Pass two grades: only once the image is neutral do you decide whether it stays monochrome or goes to colour through a photo colorizer.
Doing it in that order matters because colorization models read the neutral tones as their guide. Feed one an amber-cast scan and it treats the amber as information, which is how you end up with orange skin and a sky the colour of weak tea.
Keep the monochrome version
A colorized print is an interpretation of what the scene might have looked like. Keep the repaired black-and-white file alongside it so the family has both, and so nobody has to guess later which colours were recorded and which were suggested.
Is there a free way to restore old photos online?
Yes, several. The useful question is not whether a free route exists but what each one withholds, because it is always one of three things: a stamp on the output, a size limit, or a quota. Anyone working out how to restore old photos on no budget meets one of those walls inside an afternoon. Every figure in the table came off the supplier's own page, read on 7 September 2026.
| Route | What the free tier states | Where it stops |
|---|---|---|
| LazyKiwi workbench | 40 credits on a new account; one restoration pass costs 13 credits at 1K and 17 at 2K | Three passes at 1K before you top up. Nothing is stamped on the output. |
| [MyHeritage](https://education.myheritage.com/article/enhance-your-family-photos-using-the-myheritage-photo-enhancer/) | Its knowledge base states that "Anyone can enhance 10 photos for free", counted separately from colorized ones | The same article says "Non-subscribers will notice a watermark of the MyHeritage logo on the bottom right of their enhanced photos" |
| [Topaz Photo](https://www.topazlabs.com/topaz-photo) | A trial with the full feature set | Topaz's own [documentation](https://docs.topazlabs.com/photo-ai/quick-start) says the trial "has all the same functionality as the paid version except there is no possibility to export in Trial mode". Personal is $17 a month billed annually, $199 for the year |
| [Remini](https://remini.ai/) | A free app carried by advertising | There is no pricing page on remini.ai at all, so the quota only reveals itself inside the app |
| [Picsart](https://picsart.com/pricing/) | Credits on the free plan, but not renewing ones | Its pricing page states that "Free plan users will need to upgrade to a paid plan first in order to buy more credits", so the free allowance cannot be topped up |
Two things worth knowing. Credits in the image generator are pooled rather than tied to a single tool, so one grant stretches across repair, colour and enlargement on the same file. And image work is where people actually spend their time: LazyKiwi's August 2026 workbench figures put 57 external users on image tools and templates against 17 on video templates, which is where the restoration crowd actually sits.
What is the best photo restoration app for phone-only workflows?
Phone-only is the normal case, not the compromise case. The shoebox is at a relative's house, the flatbed is in a cupboard, and the whole job happens on a handset in an hour. Choosing a photo restoration app matters less here than most reviews suggest, because the phone capture, not the software, is what caps the result.
| Phone route | What it is good at | Where it stops |
|---|---|---|
| [Google Photos](https://blog.google/products-and-platforms/products/photos/google-photos-editing-features-availability/) | Straightening, tonal work and object removal in the app the photos already live in | Google opened these editing tools to "anyone using Google Photos, no subscription required" in April 2024, but none of them rebuilds a torn corner |
| Apple Photos | Cropping, exposure and colour on any current iPhone | It is built around pictures the phone took, not prints you found in a drawer. Creases are out of scope |
| [MyHeritage](https://education.myheritage.com/article/enhance-your-family-photos-using-the-myheritage-photo-enhancer/) | A genealogy workflow, so the enhanced file lands next to the family tree | Ten free enhancements, then a logo across the corner unless you subscribe |
| A browser tab | LazyKiwi opens in mobile Safari or Chrome and takes a picture straight out of the camera roll | A handset screen makes the close inspection harder, so judge the file on a laptop before printing |
The most common phone question is how to restore blurry old photos on phone, and the answer is usually upstream of the app. Blur in a handheld copy shot comes from the phone moving, from focus landing on the frame rather than the print, or from glare forcing a slow exposure. Brace the phone on a book, tap the print to focus, turn the flash off, and most of the blur never happens.
How do you archive the restored file so you never redo this work?
The work is worth more than the afternoon it took, and the usual way people lose it is not a hard drive failure. It is saving the restored version over the scan, then discovering six months later that the repair went too far on someone's face.
- 1
Never overwrite the scan
The untouched capture is the master. Everything else is a derivative you can regenerate. This is the single habit that separates a collection you can revisit from one you cannot.
- 2
Name files so the order is obvious
Date first, then subject, then stage: 1954-brighton-pier_01-scan.tif, then _02-repaired, then _03-colour. Alphabetical order and chronological order then agree with each other.
- 3
Keep a TIFF master and a JPEG derivative
The TIFF is for future work, the JPEG is for sharing. Regenerate the JPEG whenever you need it rather than editing it.
- 4
Three copies, two media, one off-site
The 3-2-1 rule is old and still correct. A single cloud folder is one copy, not three.
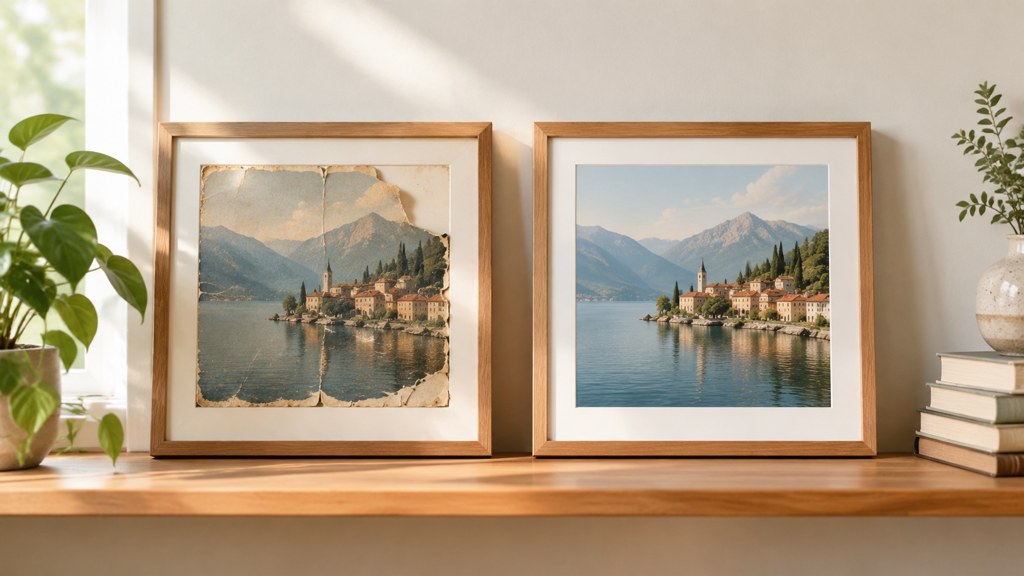
Both the National Archives preservation program (2026) and the Image Permanence Institute make the same underlying point about the physical originals: storage conditions decide how much is left to scan in ten years. Cool, dry, dark, and out of the loft.
What mistakes ruin a restored photo?
Five failures account for most bad results, and four of them are ordering errors rather than tool errors.
- **Enlarging before repairing.** Upscaling a creased scan produces a crisp, high-resolution crease. Repair first, enlarge last, every time.
- **Colorizing an uncorrected scan.** The cast becomes the colour reference. Neutralise, then colour.
- **Running the same pass three times.** Each round feeds the model its own invented detail. Skin turns to wax and hair turns to plastic by the third pass. If two runs have not fixed it, change the instruction rather than repeating it.
- **Cropping to a modern aspect ratio.** A white border, a rounded corner, a studio stamp on the mount: these are part of the object and date it. Keep a version with the border intact.
- **Saving over the master.** The one mistake with no undo.
The restored file is a new photograph made from an old one. Keep both and nobody has to argue about which is which.
— Maya Chen
There is one more that only shows up later. Restoration is generative, so anything you publish or hand to a relative should be described as restored rather than presented as the original scan. It costs one sentence and it prevents the awkward conversation where someone asks why grandad's jacket changed colour.
Key takeaways
- The whole answer to how to restore old photos is an order: scan, straighten, repair, denoise, colour, enlarge. Every bad restoration is one of those steps run early.
- The scan is the ceiling. Pick dpi from the pixel dimensions you want, save a TIFF, and never overwrite it.
- Physical loss is reconstructed, not recovered, so a tear through a face deserves more caution than a tear through a sleeve.
- The workbench has no strength slider: a second pass means a second run with the damage named in the Prompt box, at 13 credits per 1K image.
- Yellowing is a dye-layer problem. Neutralise the cast before any colour work or the cast becomes the colour reference.
Image & Design Editor
Maya Chen
Maya Chen edits the image and design desk at LazyKiwi. She spends most of her week running real files through the workbench and writing down what the settings actually did, including the runs that did not work.
FAQ
Common questions
How many credits does one restoration pass cost?
A single image is priced at 13 credits for 1K output and 17 credits for 2K, and the button carries that figure so nothing is spent by surprise. The signup grant of 40 credits stretches to three 1K passes with a few credits spare.
How to restore blurry old photos on phone without a scanner?
Photograph the print in window light at about 45 degrees with the flash off, shoot at the camera's full resolution rather than screenshotting, then run the repair pass on that file. Blur from a shaky phone capture is easier to avoid than to undo afterwards.
Should I learn how to restore old photos in Photoshop instead?
Photoshop gives you masks, layers and per-region control that a prompt box cannot match, which matters for archival work. For a shoebox of family prints the generative route is faster and the difference is usually invisible at print size.
Is a restored photo still the original?
No. Repair and colour work are generative, so the output is a new image derived from an old one. Keep the untouched scan, label the restored file as restored, and both versions stay useful for anyone who looks at them later.
Can I repair old photos that are torn straight through a face?
You can, and the result will look plausible, but the reconstructed features are the model's guess rather than a record of that person. For anything that will be shared as family history, consider leaving the damage visible and noting it.
Restore a print in the workbench
Upload the scan, name the damage in the Prompt box, and check the price on the button before you spend. The 40-credit signup grant covers three 1K passes.
Related reading
Unblur Image: Fixes That Work by Blur Type
Camera shake, missed focus and compression mush need different fixes. Diagnose the blur first, then pick the tool that can actually undo that kind.
8 min read
How to Colorize Black and White Photos With AI
Turn a monochrome print into believable colour: what AI guesses well, what it gets wrong, how to steer skin and fabric, and which free tiers hold up.
8 min read
Best AI Photo Editing Apps in 2026, Tested
Nine AI photo editors compared on the four jobs people actually run: retouch a face, clean a scene, batch a set, and export without a watermark.
10 min read
AI Real Estate Photo Editing: A Workflow Agents Can Trust
AI real estate photo editing that stays on the right side of the line: exposure fixes, clutter removal, labelled virtual staging, a pre-publish checklist.
9 min read