
Image to Video vs Video to Video: Which Should You Use?
Compare image-to-video and video-to-video workflows, then use practical checklists and prompt examples to plan your next clip.
 Daniel Okafor 9 min read
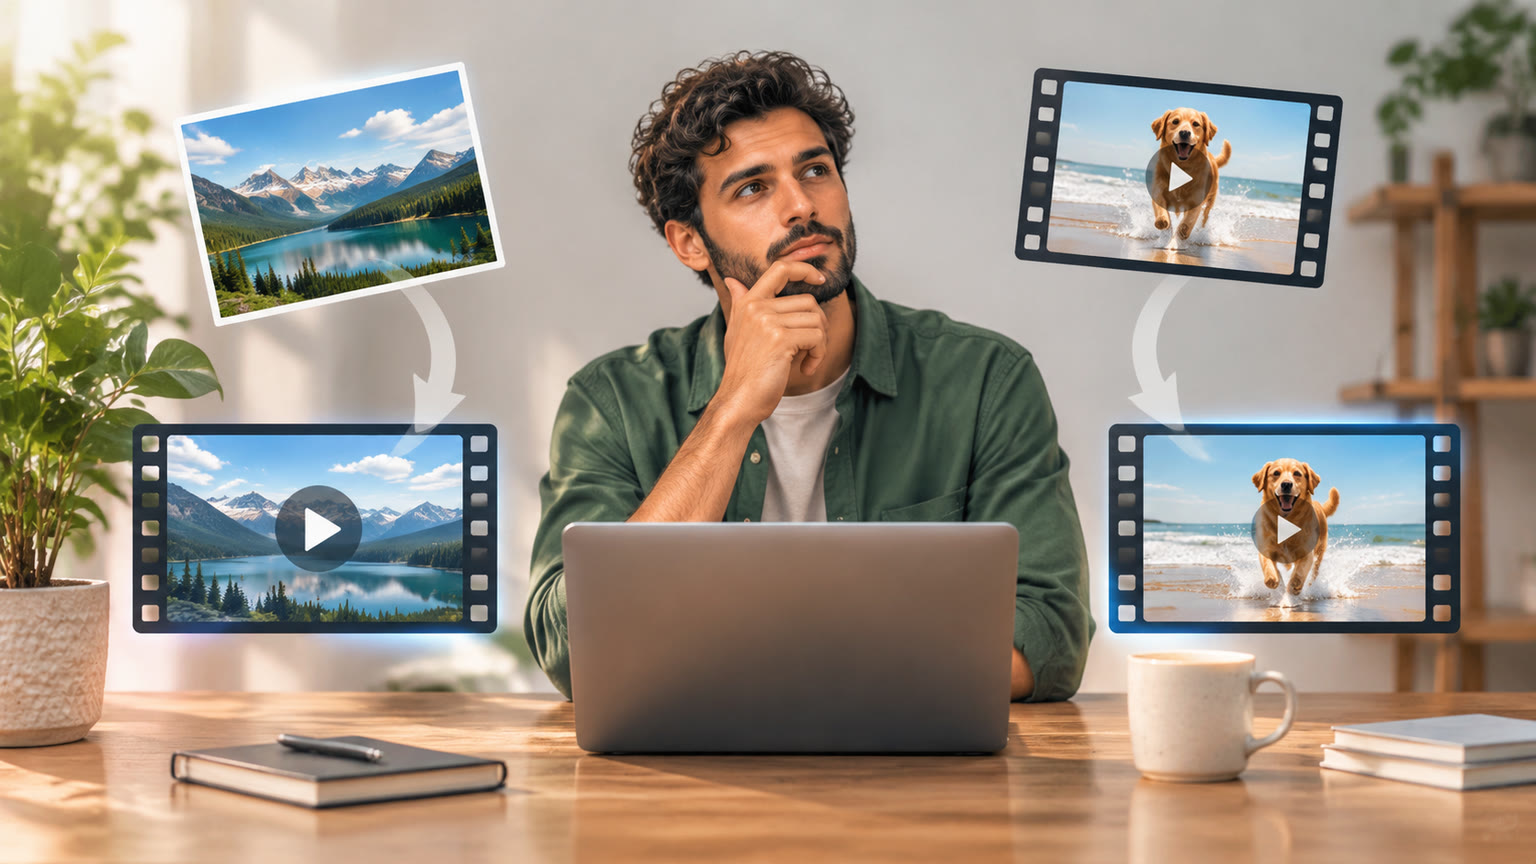
Image to video starts with a still picture and generates motion; video to video starts with an existing clip and transforms its appearance or presentation. Choose image to video when your strongest asset is a photo, illustration, or designed frame. Choose video to video when timing, camera movement, or a performance already exists and you want to build on that footage.
What Each Workflow Takes In and Produces
The difference is the starting material: image to video animates a still, while video to video uses footage as the basis for a new clip. Both can produce moving visuals, but they ask you to make different creative decisions. With a still image, you must describe what moves and how the camera behaves. With footage, you already have motion to work from, so your instructions can focus more on the look you want to change.
| Image to video | Video to video |
|---|---|
| Starts with a photo, illustration, or rendered frame. | Starts with a recorded or previously generated clip. |
| Creates motion that is not present in the input. | Uses existing action and timing as a reference. |
| Useful when composition and subject design matter most. | Useful when performance, movement, or camera work matter most. |
| Needs clear direction for subject and camera motion. | Needs clear direction for the intended transformation. |
Think of the input as your starting point, not a guarantee about every frame of the output. An image may establish a subject and composition without specifying what happens next. A video may establish an action without preserving every detail when its appearance changes. If you are deciding which route to try, ask what you cannot afford to rebuild: the look of a particular image, or the motion captured in a particular clip. That answer usually points to the right workflow.
Choose Based on the Asset You Already Have
Use image to video if your best starting asset is a still; use video to video if your best starting asset is moving footage. This sounds simple, but it prevents a common planning mistake: choosing a workflow for its visual appeal before checking whether the input contains the information your finished clip needs.
- Choose image to video for a product image that needs a gentle camera move, a character illustration that needs a short gesture, or a landscape that needs atmospheric motion.
- Choose video to video for a filmed walk, a dance phrase, a camera move through a room, or another action whose timing would be difficult to describe from scratch.
- If you have both a still and a clip, identify which one holds the detail that matters most. The still may be the better visual reference; the clip may be the better motion reference.
- If neither input is ready, plan the intended shot first. A strong source asset makes the prompt easier to write and the result easier to judge.
Quick decision test: mute the clip in your mind and describe what makes it valuable. If the answer is its pose, colors, or composition, start with the image. If the answer is its action or camera timing, start with the video.
There is no need to turn this into a permanent choice for a whole project. A campaign may use image to video for a product reveal and video to video for footage captured on set. Decide shot by shot. For ideas that begin with a still, the AI image generator is a place to explore image creation before planning motion.
Prepare an Image-to-Video Shot in Five Steps
To prepare an image-to-video shot, pick a clear still and write one specific motion direction. The image should show the subject and framing you want the clip to begin from. Your prompt then supplies the missing action: what changes, what remains relatively still, and how the viewer's perspective moves.
- 1
Choose the focal subject
Select an image with a recognizable subject and a composition that leaves room for the intended movement. If the shot depends on a face, product, or piece of text, make sure that element is easy to identify in the source.
- 2
Name one primary action
Start with a single observable change, such as a person turning toward the camera or fabric moving in a breeze. Add secondary movement only when it supports that action.
- 3
Describe the camera
Say whether the camera stays still, slowly pushes in, pulls back, pans, or follows the subject. Avoid asking for multiple camera moves unless the shot truly needs them.
- 4
Set the mood through visible details
Describe lighting, atmosphere, or background motion in concrete terms. Soft window light and moving curtain shadows are easier to picture than a vague request for a cinematic feeling.
- 5
Review the first result
Look for readable movement and a coherent subject. If the action is unclear, simplify the motion instruction before changing the entire visual concept.
Prompt pattern: “Use this image as the opening composition. The subject [one action] while [one background detail moves]. The camera [one movement]. Keep the shot focused on [focal element].” Adapt the wording to the controls offered by the tool you use.
When you need a starting concept rather than a finished image, browse video and photo templates for visual directions you can adapt. Treat any template as a creative starting point; check its actual inputs and options before building your workflow around it.
Prepare a Video-to-Video Transformation in Five Steps
To prepare a video-to-video transformation, choose a source clip with the movement you want to keep and define the visual change you want to make. A useful source does not need to have the final look. It does need to show the action, camera path, or timing that makes the shot worth transforming.
- 1
Identify the essential motion
Write down what the source contributes: a hand reaching for an object, a person crossing the frame, or a camera moving through a space. This is your reason for using footage.
- 2
Trim the idea to one shot
Plan around a short, understandable action. A clip with several unrelated moments is harder to describe and harder to evaluate as one transformation.
- 3
Specify what changes
Describe the intended visual treatment, such as a hand-drawn look, a different lighting atmosphere, or a new environment. Be concrete about the visible result.
- 4
Specify what should remain recognizable
Name the action, framing, or subject features that matter to your project. This gives you a practical standard for reviewing the output, even when the appearance changes.
- 5
Inspect the full clip
Check the opening, middle, and ending rather than judging a single frame. Motion consistency matters as much as the look of any one moment.
Prompt pattern: “Transform the source clip into [visual treatment]. Keep the main action [brief description] readable, with [important subject detail] recognizable throughout. Use [specific lighting or color detail].” Available video-to-video controls vary by tool, so confirm the workflow before preparing a large batch of footage.
Write Prompts That Match the Starting Material
An effective image-to-video prompt describes new motion; an effective video-to-video prompt describes a transformation of existing motion. Reusing the same generic prompt for both leaves out the most important information. Write down what the input already provides, then prompt for what is missing.
For an image: direct the action
Suppose your input is a still image of a glass bottle on a table. A useful direction is: “The camera slowly moves closer as light shifts across the glass and the curtain in the background sways gently.” This gives the subject a restrained role, adds background motion, and establishes a camera move. It does not ask the model to invent an unrelated event.
For a video: direct the change
Suppose your source is a clip of someone walking down a hallway. A useful transformation direction is: “Give the hallway a graphic-novel appearance with bold ink-like edges and cool overhead light, while keeping the walk and camera path easy to follow.” The walking motion is already in the source. The prompt concentrates on the new visual treatment and the elements you want to recognize afterward.
- Name the subject or action before describing style.
- Use observable verbs such as turns, drifts, approaches, or sways for image-to-video motion.
- Use concrete visual terms such as painted texture, warm side light, or muted colors for video-to-video changes.
- Remove instructions that compete with one another. A simple shot description is easier to revise.
Compare Results With a Practical Review Checklist
Judge both workflows by whether the finished clip serves the shot, not by whether it contains the most motion or the strongest effect. Review the result at normal playback speed first. Then pause at a few points to check details that matter to your project.
| For image to video, check... | For video to video, check... |
|---|---|
| Is the intended action clear from beginning to end? | Is the source action still easy to follow? |
| Does the subject stay recognizable as it moves? | Does the new look hold together across the clip? |
| Does the camera move support the composition? | Are important features recognizable when needed? |
| Do background movements help rather than distract? | Does the transformation serve the original timing? |
If a result misses the mark, change one part of the direction at a time. For image to video, try simplifying the action or camera move. For video to video, narrow the visual change or clarify which parts of the source matter most. Keeping the input and most of the prompt steady makes it easier to see whether your revision helped.
Keep a short note for each attempt: input asset, main instruction, and what you would change next. That record is more useful than trying to remember which wording produced which clip.
Build a Workflow Around the Shot You Need
The most practical workflow is to define the finished shot, choose the input that carries its most important information, and make one focused test. This works whether you are making a product moment, a character beat, or a stylized sequence. It also keeps you from spending time refining a prompt for the wrong starting asset.
- 1
Write a one-sentence shot goal
For example, “Show the product as the camera moves closer,” or “Keep the filmed dance movement while changing the scene's visual style.”
- 2
Choose the input
Use a still when the composition is the foundation. Use footage when an existing movement or performance is the foundation.
- 3
Make a focused test
Give one clear instruction for motion or transformation. Review the whole result before adding more detail.
- 4
Decide the next revision
Change the source if it lacks essential information. Change the prompt if the source is sound but the direction is unclear.
The AI video generator is a starting point for exploring video creation on LazyKiwi. You can also browse the model directory to see listed options. Check the relevant page for the inputs and controls currently offered; a general video creation page should not be taken as a promise that every image-to-video or video-to-video workflow is available.
Key takeaways
- Image to video creates motion from a still; video to video transforms footage that already has motion.
- Choose the workflow based on whether your image composition or your clip's action matters more.
- Prompt for missing motion with a still, and prompt for a specific visual change with footage.
- Review the entire clip, then revise one instruction or input choice at a time.
- Check a tool's actual inputs and controls before planning a project around either workflow.
Video Workflows Editor
Daniel Okafor
I run the same clip through every video and motion tool we ship and write down what actually changes: timing, length, export, and where each one falls apart.
FAQ
Common questions
Is image to video the same as video to video?
No. Image to video starts with a still and generates movement, while video to video starts with a clip and uses its existing motion as the basis for a transformation. The right choice depends on what your source asset already contains.
Which should I use for a product photo?
Start with image to video if the photo has the framing and product appearance you want. Describe a restrained subject, background, or camera movement that supports the product instead of asking for several actions at once.
Which should I use to change the look of filmed footage?
Video to video is the relevant workflow when the filmed action and timing matter. Describe the new appearance and identify which parts of the original movement should remain easy to follow.
Can I use both workflows in one project?
Yes. You can plan separate shots around different source assets, such as an animated still for an opening and transformed footage for an action sequence. Choose the method for each shot rather than forcing every clip through one process.
Do I need a detailed prompt for image to video?
You need a specific prompt, but it does not have to be long. Start with one subject action, one camera direction, and any background motion that matters. Add detail only when a test shows what is missing.
Does LazyKiwi offer both workflows?
LazyKiwi has an AI video generator page, but the information provided here does not confirm that both specific workflows are available. Check the current tool page for its supported inputs and controls before preparing assets for either method.
Plan Your Next AI Video Shot
Start with the asset you have, define the motion or transformation you need, and explore the current video creation options.
Keep reading
Free Video Upscaler: A Practical Step-by-Step Guide
Learn how to upscale video for free, choose useful settings, and check whether the result actually looks better.
7 min read
Free AI Animation Tools for Short Scenes: A Guide
Choose an AI animation workflow for a short scene, write a focused prompt, and check free-use limits before you create.
6 min read
AI Dance Video Generator Free: A Practical Guide
Learn how to make an AI dance video, choose a template, write a useful prompt, and check free access before you generate.
8 min read